• Skip to primary navigation
  • Skip to main content
  • Skip to primary sidebar
  • Skip to footer
  • Home
  • Recipes
  • Hiking
  • Contact

Holly in the PNW

The girl that can't sit still!

Comfort Foods

Sourdough Focaccia

October 3, 2024

Making sourdough focaccia isn’t just about the delicious outcome; it’s an experience.

The process of nurturing a sourdough starter and watching your dough rise is deeply satisfying. The tangy flavor of sourdough pairs perfectly with the richness of olive oil, fresh rosemary and the crunch of sea salt. Plus, it’s a great way to impress your friends and family with your baking skills.

Bread-making like this is not just about the taste it’s about creating something from scratch with your own hands, which is so rewarding. So really, why not make it?

Here’s a recipe that should make your kitchen smell amazing.

Let’s get started! Don’t let the recipe give you anexity on how long it will take. Be patient and you will be thankful.

  • Bread Timeline example:
    • Thursday night: Remove starter from fridge and feed. I always feed it with 4 ounces flour and a half cup filtered water.
    • Friday: Leave on counter
    • Saturday morning: Remove the amount of starter you need to make the dough. Make the dough and let it rise the first time.
    • Sunday morning or afternoon: Do the second rise in the 9×13 pan. Follow instructions.
    • Monday morning or afternoon: Assemble the focaccia and bake the bread.


Whisk the starter, water, and honey in a large bowl. Add the flour and salt. Mix with a fork and then continue to combine with your hands until the flour is absorbed.


Bulk Rise: Cover the bowl with plastic wrap and let rise overnight, at room temperature, about 12-18 hours. The dough is ready when it no longer looks dense and has doubled in size and look stringy. There may also be bubbles on the surface as well. Picutred below.

Second Rise: In your 9×13 pan pour 2 tablespoons of olive oil and spread around to coat the bottom. Dump the dough onto the pan. Turn over to coat both sides with oil. No need to stretch or spread the dough out yet. Cover the pan with plastic wrap and let rest for 1 1/2 to 2 hours until very puffy. You can let it rise overnight again which I did but not necessary.

This is what it looked like after rising overnight from the picture above.

Assemble the Focaccia: Gently stretch the dough to reach the corners of the 9×13 pan. Use your fingertips to dimple the dough. Drizzle the remaining 2 tablespoons of olive oil and sprinkle on 2 Tablespoons of chopped fresh rosemary.

Gently press the rosemary leaves into the dough. Sprinkle with additional flaky sea salt (optional). I forgot to add it on mine but it’s make the bread even more delicious so I highly recommend the flaky sea salt.

Bake: Bake the focaccia on the center rack, in a preheated 425 degrees oven, for 20-25 minutes until crispy and golden brown.

Remove from the oven and cool before cutting into wedges using a serrated knife. Serve warm is the best way to eat it!

There are many reasons why to make this sourdough focaccia bread. It’s a delightful base for endless toppings—think caramelized onions, sun-dried tomatoes, or a sprinkle of sea salt like I mentioned before. It’s versatile enough to be the star of your meal or a fantastic side with your favorite soup or any meal. And let’s not forget, baking (and eating) it is like a mini-vacation to Italy, with every bite bringing a bit of Mediterranean magic to your day.

Enjoy!!!

Print

Sourdough Focaccia

Course Bread
Cuisine American, Italian
Keyword Sourdough Focaccia

Ingredients

  • 100 g 1/2 cup bubbly, active starter
  • 360 g 1 1/2 cups cool water
  • 21 g 1 tbsp honey
  • 600 g 5 cups bread flour or italian flour
  • 9 g 1 1/2 tsp salt
  • 4 tbps olive oil
  • 2 tbps fresh rosemary chopped
  • flaky sea salt optional

Instructions

  1. To make the dough:

    Whisk the starter, water, and honey in a large bowl. Add the flour and salt. Mix with a fork and then continue to combine with your hands until the flour is absorbed.

  2. Bulk Rise:

    Cover the bowl with plastic wrap and let rise overnight, at room temperature, about 12-18 hours. The dough is ready when it no longer looks dense and has doubled in size and look stringy. There may also be bubbles on the surface as well.

  3. Second Rise:

    In your 9×13 pan pour 2 tablespoons of olive oil and spread around to coat the bottom. Dump the dough onto the pan. Turn over to coat both sides with oil. No need to stretch or spread the dough out yet. Cover the pan with plastic wrap and let rest for 1 1/2 to 2 hours until very puffy. You can let it rise overnight again which I did but not necessary.

  4. Assemble the Focaccia:

    Gently stretch the dough to reach the corners of the 9×13 pan. Use your fingertips to dimple the dough. Drizzle the remaining 2 tablespoons of olive oil and sprinkle on 2 Tablespoons of chopped fresh rosemary. Gently press the rosemary leaves into the dough. Sprinkle with additional flaky sea salt (optional).

  5. Bake:

    Bake the focaccia on the center rack, in a preheated 425 degrees oven, for 20-25 minutes until crispy and golden brown. Remove from the oven and cool before cutting into wedges using a serrated knife. Serve warm.

Recipe Notes

  • Flour: Italian flour or bread flour is recommended, but all purpose will also work.
  • Make sure your starter is active before you start. Drop a small piece in a bowl of water to see if it floats. It it does, then it’s ready! If not, then it may need 1-2 more feedings.
  • Use A Kitchen Scale. For best accuracy, it’s best that you weigh your ingredients and not rely on volume (measuring cups).
  • Plastic Wrap! When you let the dough rise overnight, be sure to use plastic wrap to cover it so it doesn’t dry out and not rise properly.
  • Bread Timeline example:
    • Thursday night: Remove starter from fridge and feed. I always feed it with 4 ounces flour and a half cup filtered water.
    • Friday: Leave on counter 
    • Saturday morning: Remove the amount of starter you need to make the dough. Make the dough and let it rise the first time.
    • Sunday morning or afternoon: Do the second rise in the 9x13 pan. Follow instructions.
    • Monday morning or afternoon: Assemble the focaccia and bake the bread.

Filed Under: Appetizers, Comfort Foods, Dinner, Everyday Meals

Curry Couscous Salad

November 12, 2019

I’ve been making Curry Couscous Salad for about 12 years now and it’s a perfect side dish to bring to a potluck or gathering. I love curry and if you’re like me you will love this dish! It makes a size for larger groups or if you are food prepping for the week you can eat some every day!
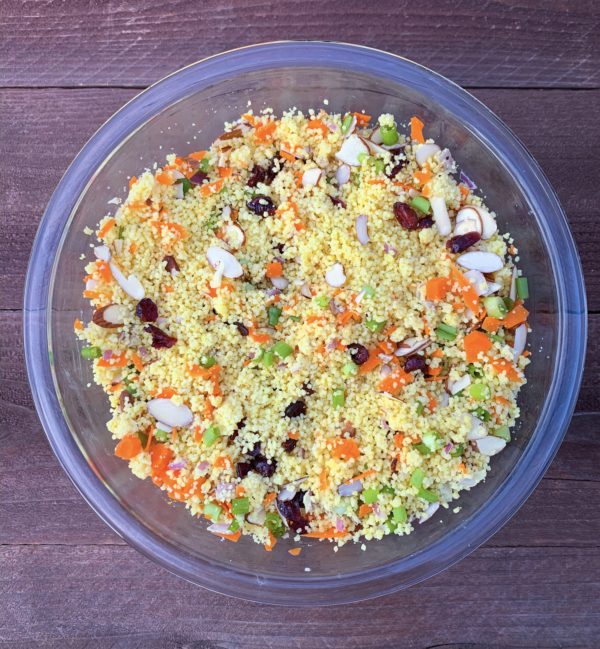
  • Place the couscous and butter in a medium bowl. Pour the boiling water over the top and stir until the butter has melted. Cover tightly with plastic wrap and let set for 5 minutes.
  • Meanwhile, in a small bowl combine olive oil, yogurt, red wine vinegar, 2 teaspoons salt, 1 teaspoon pepper, 1 teaspoon curry paste and 1/4 teaspoon turmeric. Whisk until smooth.
  • Fluff couscous with a fork and pour in yogurt sauce. Stir until couscous is evenly coated. Mix in carrots, cranberries, almonds, red onions, and scallions. Serve at room temperature.
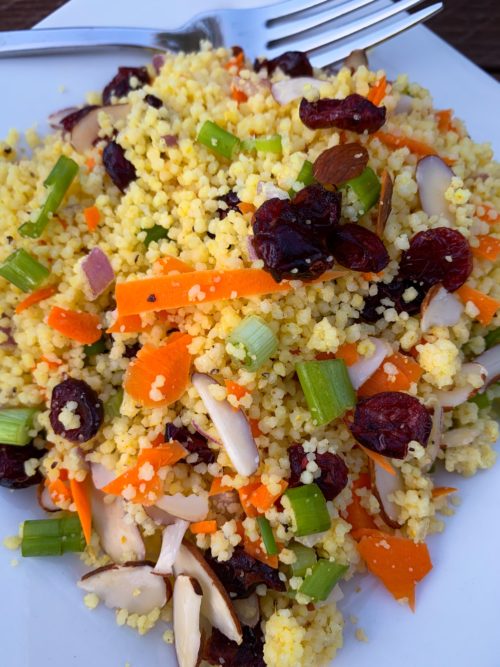
Dish up the curry couscous and dig in! This stores great in the fridge for up to a week.
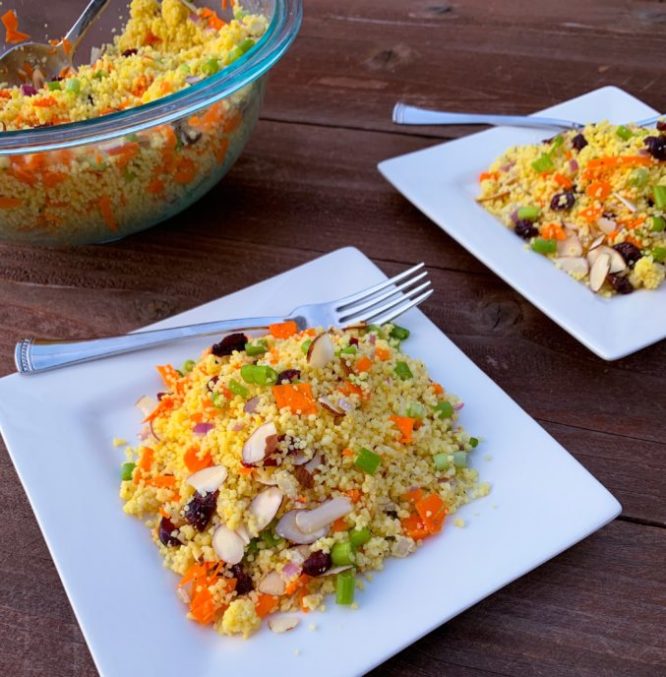
Enjoy!!!

Print

Curry Couscous Salad

Course Dinner, Lunch, Main Course, Side Dish
Cuisine American
Keyword Curry Couscous Salad
Prep Time 15 minutes
Cook Time 10 minutes
Servings 12 servings

Ingredients

  • 2 cups couscous
  • 1 tbsp butter (salted or unsalted)
  • 1 1/2 cups boiling water
  • 1/4 cup olive oil
  • 1/4 cup Greek yogurt
  • 1 tsp red wine vinegar
  • 2 tsp salt
  • 1 tsp black pepper
  • 1 tsp curry paste or more if you want it spicy
  • 1/4 tsp ground turmeric
  • 1/2 cup grated carrots
  • 1/2 cup dried cranberries
  • 1/4 cup sliced almonds
  • 1/4 cup red onions finely chopped
  • 3 scallions finely chopped

Instructions

  1. Place the couscous and butter in a medium bowl. Pour the boiling water over the top and stir until the butter has melted. Cover tightly with plastic wrap and let set for 5 minutes.
  2. In a separate small bowl combine olive oil, yogurt, red wine vinegar, salt, pepper, curry paste and turmeric. Whisk until smooth.

  3. Fluff couscous with a fork and pour in yogurt sauce. Stir until couscous is evenly coated. Mix in carrots, cranberries, almonds, red onions, and scallions.

  4. Serve at room temperature. Store in fridge for up to a week.

Filed Under: Comfort Foods, Everyday Meals, Vegetarian Dishes

Tomato Soup

November 12, 2019

It’s soup season and I especially love Tomato Soup! This tomato soup is really easy to make. You will thank me on these chilly days cause this tomato soup will warm you right up!

Only a few simple and delicious ingredients make this soup possible.

In large pot add oil, carrots, yellow onion and garlic. Saute for 5-10 minutes until the vegetables are very tender. Add the tomato paste. Stir for a few minutes until the tomato paste starts to brown and caramelize. Add the flour and stir for a minute.

Pour the tomatoes and the juices in a separate bowl. Crush up the whole tomatoes with a fork or spoon. Add the tomatoes and juice to the pot. Add the broth, thyme and bay leaf to the pot. Simmer for 30 minutes.

Remove pot from the stove and use a hand blender to puree the soup. If you don’t have a hand blender you can use a blender. If you use the blender let the soup cool first, then return to stove and simmer until hot.

Serve with croutons, cheese, cream or even a grilled cheese sandwich!!!! Choose a topping that you desire or keep it plain and eat it right out of the pot. You will not be disappointed with this tomato soup.

Enjoy!!!


Print

Tomato Soup

Course Dinner, Lunch, Main Course, Side Dish
Cuisine American
Prep Time 20 minutes
Cook Time 30 minutes

Ingredients

  • 2 tbsp olive oil
  • 4 carrots chopped
  • 1 yellow onion chopped
  • 8 cloves garlic minced
  • 3 tbsp tomato paste
  • 2 tbsp flour
  • 8 cups chicken broth
  • 1 tsp dried thyme
  • 2 bay leaf
  • 2 28 - ounce can whole tomatoes

Instructions

  1. Add the oil, carrots, onion, and garlic to the soup pot. Saute for 5-10 minutes until the vegetables are tender.
  2. Add the tomato paste – stir for a few minutes until the tomato paste starts to brown and caramelize. Add the flour and stir for a minute.
  3. Pour the tomatoes and their juice into a bowl and crush them a fork or spoon. Add the broth, thyme, bay leaf, and tomatoes to the soup pot. Simmer for 30 minutes.
  4. Remove pot from the stove and use a hand blender to puree the soup. If you don't have a hand blender you can use a blender. If you use the blender let the soup cool first then return to stove and let simmer until hot.

  5. Serve with croutons, cheese or cream (if desired).

Filed Under: Comfort Foods, Everyday Meals, Lunch

Banana Bread

August 14, 2019

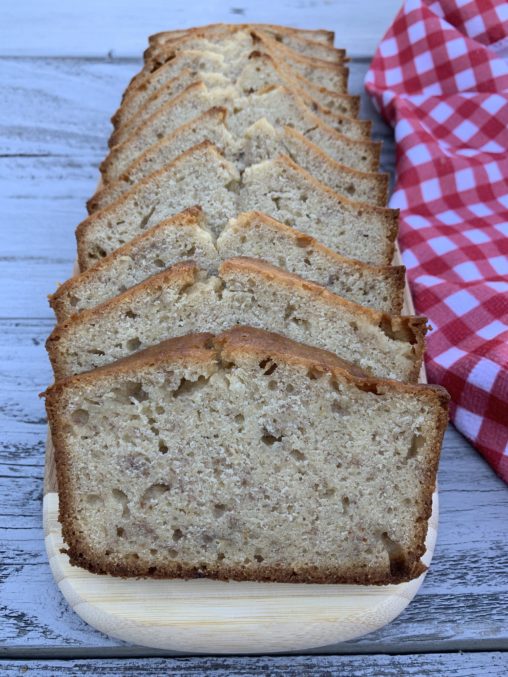
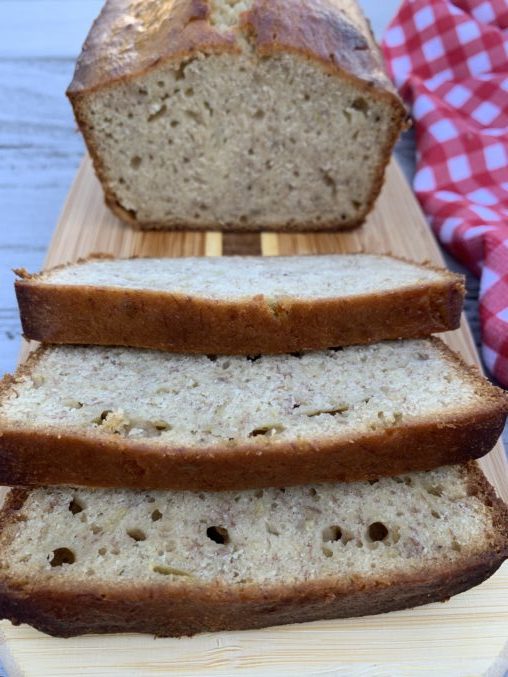
If you know me then you know I love bananas! I recently had a birthday and one of my girlfriends decided to buy me a large bunch of bananas as a gag gift. It was perfect, but I couldn’t eat them fast enough so I got to make Banana Bread! Over ripe bananas are perfect for this easy to make banana bread.

All you need is a bowl and a mixer to whip this banana bread right up!  Grab the butter, sugar, eggs, mashed bananas, vanilla, flour and baking soda.

Cream butter and sugar until smooth. Beat in eggs, vanilla and then bananas. Add flour and soda, stirring just until combined.

Pour into prepared pan and bake at 350 degrees F (175 degrees C) for about 1 hour (or till toothpick comes out clean). If the bread is not done place tin foil over bread and cook in 5 minute increments until done. Remove from pan and let cool, store in refrigerator or freeze.

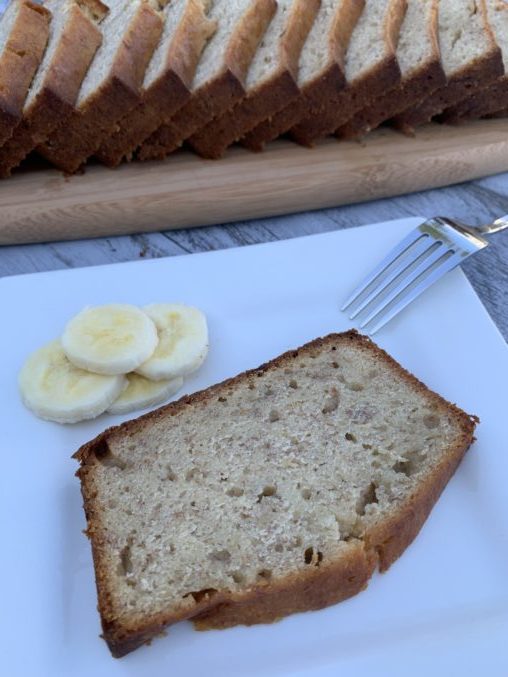
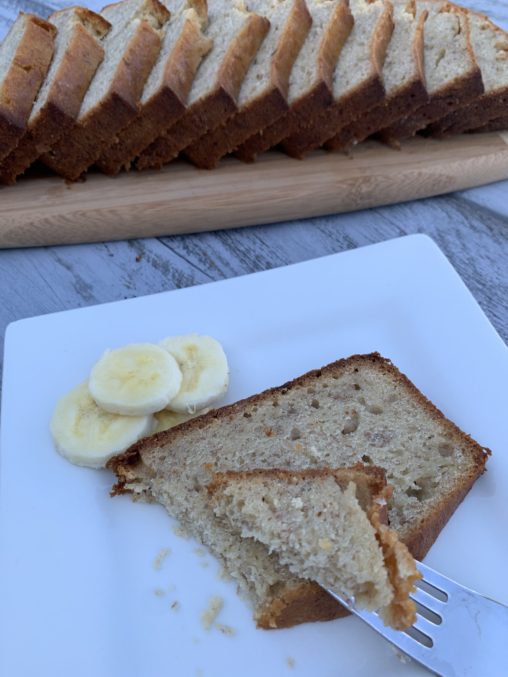
Slice up the bread and serve it warm. Top with butter if desired. Eating this banana bread warm with a cup of coffee could make for one of the best mornings ever!

Dig in! Enjoy!!!

Print

Banana Bread

Course Breakfast
Cuisine American
Keyword Banana Bread
Prep Time 15 minutes
Cook Time 1 hour
Total Time 1 hour 15 minutes
Servings 12 slices

Ingredients

  • 1/2 cup unsalted butter softened
  • 1 cup white sugar
  • 2 eggs
  • 1 1/2 cups mashed bananas about 3 bananas
  • 1 tsp vanilla extract
  • 2 cups all-purpose flower
  • 1 tsp baking soda

Instructions

  1. Preheat oven to 350 degrees F (175 degrees C). Grease and flour one 9x5 inch pan.

  2. Cream butter and sugar until smooth. Beat in eggs, vanilla and then bananas. Add flour and soda, stirring just until combined.

  3. Pour into prepared pan and bake at 350 degrees F (175 degrees C) for about 1 hour (or till toothpick comes out clean). If you need to cook longer than an hour place tin foil over bread and bake in 5 minute increments. Remove from pan and let cool, store in refrigerator or freeze.

Filed Under: Breakfast, Comfort Foods

Caramel Popcorn with Almonds

April 8, 2019

It’s baseball season and it reminds me of caramel popcorn at the ball park! I had left over caramel sauce from my Marshmallow Caramel Rice Krispie Treats so I decided to pop some popcorn to finish off the sauce. The sauce worked perfectly with popcorn and I threw in some almonds. Caramel popcorn with almonds is a great little sweet snack!

Get your air popper out and grab those kernels and pop away! Fresh air popped popcorn is my favorite, but you can also use microwave popcorn.

Instead of paying $10 per bag at the ballpark, you can make your own for a lot less and it makes a lot more! You can sit on your couch and watch the game and eat this yummy treat and be just as happy.

If you’re not a fan of baseball, grab your favorite movie and devour this caramel popcorn with almonds. It will go quick!

Enjoy!!!

Print

Caramel Popcorn with Almonds

Course Appetizer, Dessert
Cuisine American
Keyword Caramel Popcorn with Almonds
Prep Time 20 minutes
Cook Time 10 minutes
Total Time 30 minutes
Servings 8 people

Ingredients

  • 1 cup popcorn
  • 6 ounces caramels (wrapped)
  • 1/2 cup heavy cream
  • 1/2 tbsp unsalted butter
  • 1 cup almonds
  • salt (to taste)

Instructions

  1. Grab a bowl or large pot. Pop the popcorn over the stove or use an air popper (you can use microwave popcorn as well). Add the almonds to the popcorn.

  2. In a medium saucepan place the unwrapped caramels, heavy cream and butter. Over medium heat stir constantly until creamy.

  3. Let the caramel sauce cool (about 10 minutes) then pour all over popcorn. Stir with a wooden spoon until covered evenly. Sprinkle salt over caramel popcorn if desired. 

Recipe Notes

Popcorn will last for a few days in an airtight container.

Filed Under: Appetizers, Comfort Foods, Desserts

Primary Sidebar

Hello and Welcome

Hi! I'm Holly and welcome to my personal blog and thank you for taking the time to look through my recipes and hiking adventures. I hope you enjoy them as much as me. Stay connected to see upcoming blog posts! I'm excited to have you join!

Recent Posts

  • Sourdough Focaccia
  • Andes Mint Truffles
  • Cole Slaw
  • Pumpkin Spice Cupcakes
  • Chicken Tortilla Soup

Archives

  • October 2024
  • December 2023
  • October 2023
  • August 2022
  • April 2022
  • February 2022
  • January 2021
  • May 2020
  • April 2020
  • February 2020
  • November 2019
  • October 2019
  • August 2019
  • July 2019
  • June 2019
  • May 2019
  • April 2019
  • March 2019
  • February 2019
  • January 2019
  • December 2018
  • November 2018
  • October 2018
  • September 2018
  • August 2018
  • July 2018
  • June 2018
  • May 2018

Categories

Don’t Miss These!

Chocolate Nutella Basketball Cake

Cinnamon Sugar (Doughnut) Muffins

Bagel Bites

Andes Mint Truffles

Most Popular Recipes

Oreo Chocolate Cake

Artichoke Parmesan Dip

Footer

My Favorites

stay connected

  • Facebook
  • Instagram
  • Pinterest

Don’t miss a recipe or an adventure!

Copyright© 2025 · Brunch Pro Theme by Feast Design Co.