• Skip to primary navigation
  • Skip to main content
  • Skip to primary sidebar
  • Skip to footer
  • Home
  • Recipes
  • Hiking
  • Contact

Holly in the PNW

The girl that can't sit still!

Sidebar/Content

Chocolate Chip Cookie Cake

August 21, 2018

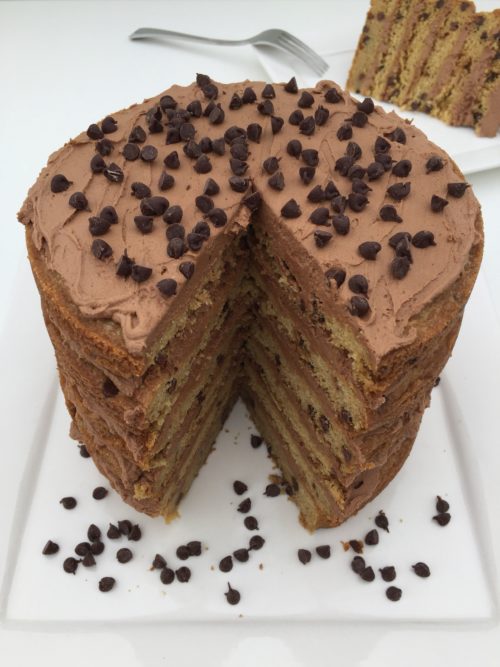
Who doesn’t like a six layer Chocolate Chip Cookie Cake with Peanut Butter Chocolate frosting?! This cake is delicious in every way!

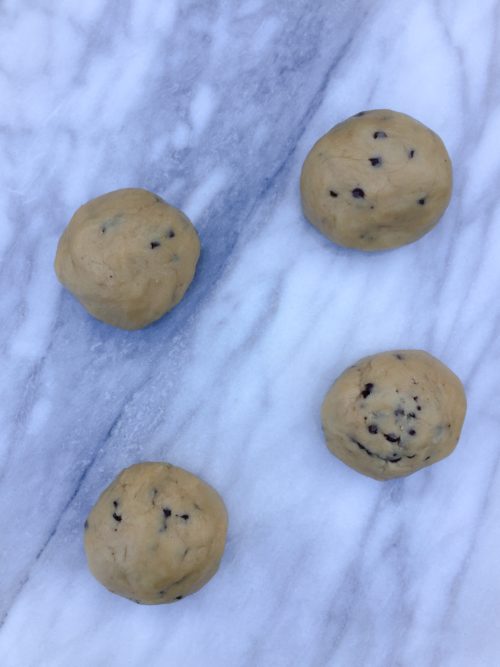
To start make the chocolate chip cookie mix and divide into six even balls. This is showing only four balls but indeed I did make six. I used a food scale to weigh out the balls but if you don’t have one just eye ball it.

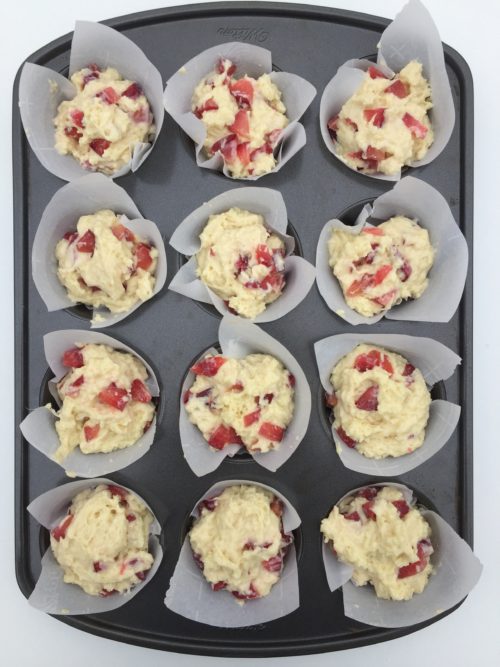
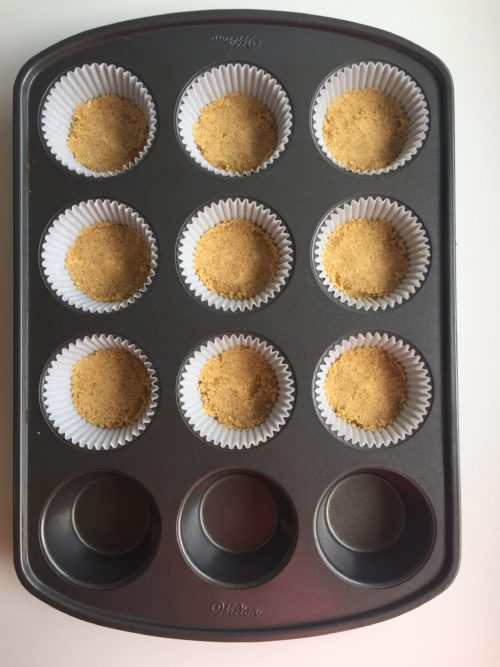
Add the cookie dough to the baking pans. Place parchment paper at the bottom of the pan and grease it. I cut out parchment paper and fit it to the bottom of the pan. Make sure you do this so the cake won’t stick to the pan. It will be an easy release.

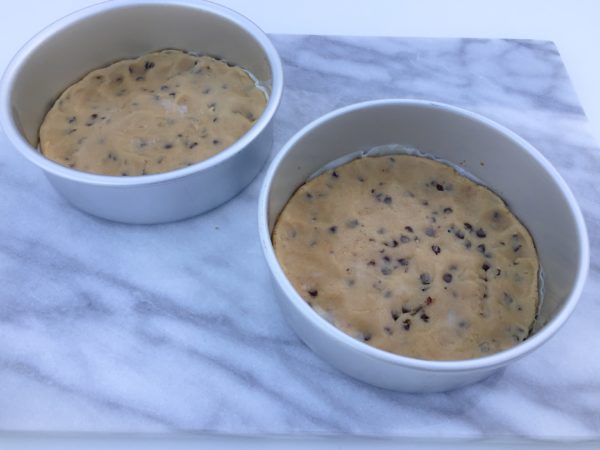
I only have 2 six inch round pans so I had to bake my cakes in 3 batches. Bake for about 17-20 minutes.

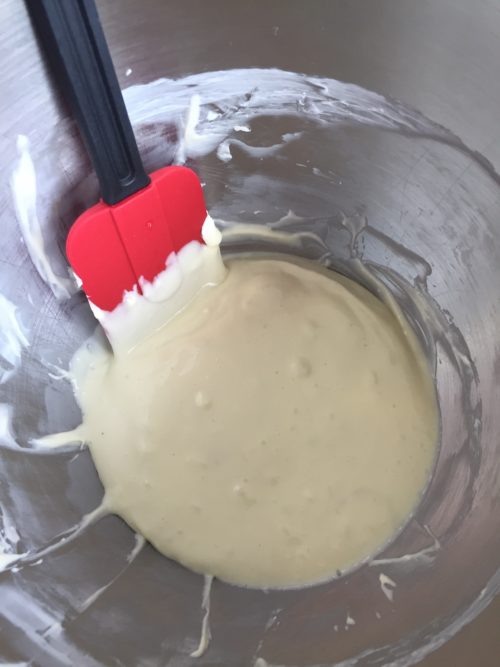
Make the peanut butter chocolate frosting and assemble. Add chocolate chips to the top. You can make any type of frosting to go with this cake so if you don’t like peanut butter make another flavor.

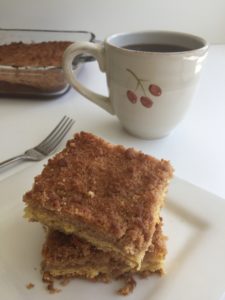
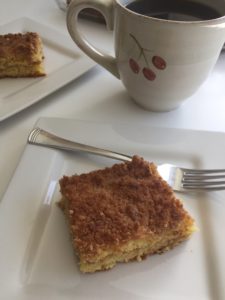
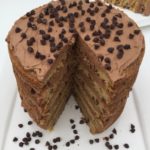
Cut out a huge piece and devour! It’s great with vanilla ice cream too! Enjoy!

Print

Chocolate Chip Cookie Cake

Course Dessert
Keyword Chocolate Chip Cookie Cake
Prep Time 30 minutes
Cook Time 20 minutes
Total Time 50 minutes
Servings 12 slices

Ingredients

Ingredients

  • 3 cups all-purpose flour (spoon & leveled)
  • 2 tsp cornstarch
  • 1 tsp baking soda
  • 1 tsp salt
  • 1 cup unsalted butter softened to room temperature
  • 1 cup packed light or dark brown sugar
  • 1/2 cup granulated sugar
  • 2 large eggs at room temperature
  • 2 1/2 tsp pure vanilla extract
  • 2 cups mini semi-sweet chocolate chips, plus extra for garnish (regular size is fine too)

Chocolate Peanut Butter Frosting

  • 1/2 cup unsalted butter softened to room temperature
  • 1/4 cup creamy peanut butter*
  • 1 3/4 cups confectioners' sugar (or more)
  • 1/4 cup unsweetened natural or dutch-process cocoa powder
  • 1/2 tsp pure vanilla extract
  • 1 tbsp milk (or more)

Instructions

Directions:

  1. Preheat oven to 350°F (177°C). Grease 2-inch cake pans (or more if you have more than 2), line with parchment paper, then grease the parchment paper. Parchment paper helps the small cookie cakes seamlessly release from the pans.

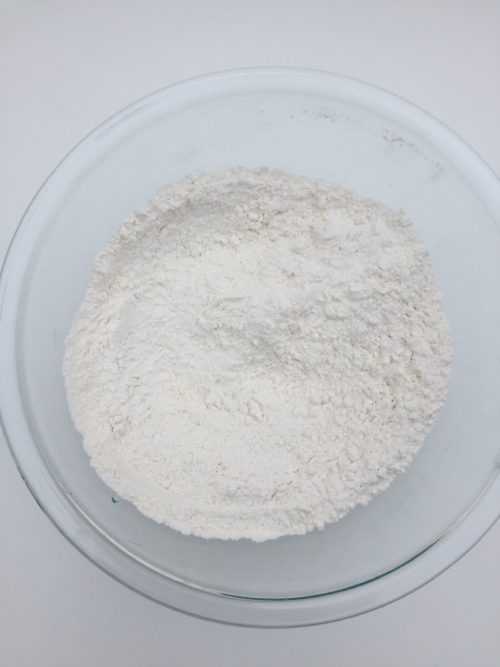
  2. Make the cookie cake: Whisk the flour, cornstarch, baking soda, and salt together in a medium bowl. Set aside.
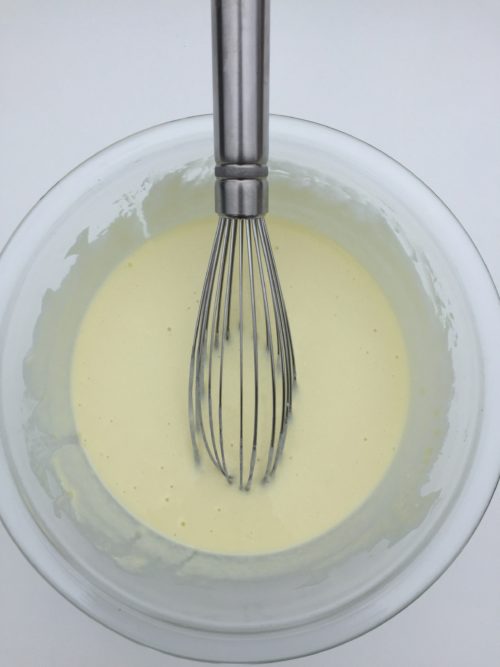
  3. In a large bowl using a hand mixer or a stand mixer fitted with a paddle attachment, beat the butter, brown sugar, and granulated sugar together on medium-high speed until smooth and creamed, about 2 minutes. Add the eggs and vanilla extract and beat on high speed until combined, about 1 minute. Scrape down the sides and up the bottom of the bowl and beat again as needed to combine.
  4. Add the dry ingredients to the wet ingredients and mix on low until combined. With the mixer running on low speed, stir in the mini chocolate chips. Dough will be thick and sticky.

  5. Divide cookie dough between however many cake pans you're using. Press evenly into each. I only have 2 6-inch cake pans, so I baked in batches. If baking in batches, cover any cookie dough that isn't being used and set aside at room temperature.

  6. Bake for 17 - 20 minutes or until the cake layers are lightly brown on top and a toothpick inserted in the center comes out mostly clean. Allow cakes to cool for 10 minutes in the pans. Run a sharp knife around the edges, then carefully invert the pan so the warm cookie cake slides out. (At this point you can clean out pans, grease, line with parchment, grease parchment, then bake remaining cakes if needed.) Set the baked cakes on a wire rack to cool completely. The cakes must be completely cool before frosting and assembling.

Make the frosting

  1. With a handheld or stand mixer fitted with a paddle or whisk attachment, beat the butter and peanut butter together on medium speed until creamy and smooth, about 2 minutes. Add confectioners' sugar, cocoa powder, vanilla extract, and 1 Tablespoon milk. Mix on low speed for 30 seconds, then increase to high speed and beat for 2 minutes. Add another Tablespoon of milk if frosting is too thick. If too thin add more confectioners' sugar. 

Assemble and decorate

  1. Place 1 cake layer on your cake stand or serving plate. Evenly cover the top with frosting. Continue layering the cake layers and frosting. Spread the remaining frosting all over the top and sides, if there's any leftover for the sides! If desired, top with chocolate chips. Slice and serve.

Filed Under: Desserts

Plum Muffins

August 4, 2018

A friend of mine brought me some plums from her plum tree and she told me to bake something yummy so I came up with plum muffins. I’ve never tried to bake with plums before and I’m so glad I did. The plum muffins were very moist and delicious.  So don’t judge until you make these plum muffins.

Sift flour, baking powder, and baking soda into a large bowl. Add the sugar.

In a separate bowl whisk together the eggs, olive oil and greek yogurt until smooth.

Wash the plums and chop into pieces. You can use more or less plums. If you use more they will be more flavorful.

Slowly stir the yogurt mixture into the dry ingredients in the large bowl, until just combined. Do not over stir this will make the muffins too dense. You want these plum muffins nice and moist. Gently stir in the plums, with just a few turns.

Line the muffin pan with parchment paper and add about 2 tablespoons of plum muffin batter to the pan. Sprinkle the top with coarse sugar if you desire. The recipe makes about 14 muffins.

Bake the plum muffins for 18 – 20 minutes or golden brown at 350 degrees.

Serve warm! Enjoy these plum muffins for your morning breakfast. It will be a good start to your day!

You can also serve the muffins with a little bit of butter. Try these and don’t be scared to try something out of the ordinary. Plum Muffins will be on my summer list always! Hopefully my friend brings me plums every year!


Print

Plum Muffins

Course Breakfast, Dessert
Keyword Plum Muffins
Prep Time 20 minutes
Cook Time 20 minutes
Total Time 40 minutes
Servings 14 muffins

Ingredients

  • 2 cups all purpose flour sifted
  • 2 tsp baking powder sifted
  • 1/2 tsp baking soda sifted
  • 1/2 cup granulated sugar
  • 2 eggs
  • 1/2 cup olive oil
  • 1 cup greek yogurt
  • 6 small plums
  • course sugar if desired

Instructions

  1. Preheat the oven to 350ºF

  2. Sift flour, baking powder, and baking soda into a large bowl. Stir in sugar.

  3. In a separate bowl whisk together the eggs, olive oil and greek yogurt, until smooth.

  4. Wash the plums and chop into pieces. You may use more or less plums if you desire.

  5. Slowly stir the yogurt mixture into the dry ingredients in the large bowl, until just combined. Do not over stir this will make the muffins too dense. You want these plum muffins nice and moist. 

  6. Gently stir in the plums, with just a few turns.

  7. Line the muffin pan with parchment paper and add about 2 tablespoons of plum muffin batter to the pan. Sprinkle the top with coarse sugar if you desire.

  8. Bake the plum muffins for 18 - 20 minutes or golden brown.


Filed Under: Breakfast, Desserts

Blueberry Mini Pies

July 30, 2018

Summer blueberry picking is one of my favorite things to do and making mini blueberry mini pies to share with my friends and family.

The other day I went out blueberry picking with my girlfriends in North Bend at Bybee Farms which is 30 mins from Seattle. I also hike in North Bend a lot after work so it’s one of my favorite places to visit. It was a lovely HOT summer day to pick some delicious blueberries.  We picked over 9 pounds each so that means blueberry mini pies to make!

These blueberry mini pies are so easy to make and they are pretty quick!  Start by making the blueberry filling first since it needs to cool for 30 minutes.

The dough will make 5 blueberry mini pies.  You can double the dough recipe to make more. Roll out the dough and cut out 3.5 inch circles.  I used a cookie cutter I purchased from amazon.

https://www.amazon.com/Ateco-14403-3-5-Inch-Stainless-Cutter/dp/B002A8QOUU/ref=as_li_ss_tl?ie=UTF8&linkCode=sl1&tag=sallsbakiaddi-20&linkId=9c4ef3174120198d585eb15042a7cbb1

Assemble the blueberry mini pies and top with course sugar if desired. Serve them warm and top with vanilla ice cream!

Print

Blueberry Mini Pies


Course Dessert
Keyword Blueberry Mini Pies
Prep Time 30 minutes
Cook Time 30 minutes
Resting Time 25 minutes
Total Time 1 hour 25 minutes
Servings 5 pies

Ingredients

Pie Crust

  • 2 cups all purpose flour
  • 1 tsp salt
  • 2/3 cup plus 2 tbsp shortening
  • 4 - 5 tbsp water
  • 1 egg for top of crust
  • course sugar optional

Blueberry filling

  • 2 cups fresh blueberries
  • 1 1/2 tbsp cornstarch
  • 1/3 cup granulated sugar
  • 1 splash lemon juice

Instructions

Blueberry filling

  1. Combine the blueberries, cornstarch, granulated sugar, and lemon juice together in a medium saucepan or skillet over low-medium heat. While occasionally stirring, bring to a simmer. Allow to simmer for 2 minutes. Remove from heat and allow to cool uncovered at room temperature for 30 minutes. 

Pie Crust

  1. Measure flour and salt into bowl. Cut in shortening thoroughly. Sprinkle in water, 1 tablespoon at a time, mixing until all flour is moistened and dough almost cleans side of the bowl. (1 or 2 teaspoons water can be added if needed).

  2. Gather dough into a ball and turn the dough about a quarter turn after every few rolls. At any sign of sticking, sprinkle some flour underneath then keep rolling. 

  3. Roll out until it's about 12 inches in diameter and about 1/8th - 1/4th inch thick. Using your cookie cutter, cut into circles. Re-roll any scraps and cut into circles. 

  4. Refrigerate cut circles for at least 15 minutes before filling the hand pies.

  5. Meanwhile, preheat oven to 375°F (191°C). Line one large baking sheet with parchment paper or silicone baking mats.

Fill the mini pies

  1. Arrange half of the circles about 3 inches apart on prepared baking sheets. These are the bottom crusts. Using a sharp knife, cut slits into the remaining circles. These are the top crusts. The slits act as vents so that steam can escape as the hand pies bake. Place about 2 Tablespoons of filling in the center of each bottom crust. (Or however much fits while leaving the edges bare.) Place top crust on top. Press your fingers all around the edges to seal, then crimp with a fork. If the hand pies lost some shape, use your hands to form a round circle again. It's OK if some filling juice is leaking out. Lightly brush the top of the pie crust with egg wash mixture. Sprinkle with coarse sugar, if desired.
  2. At this point the hand pies can be baked, but if they don't feel cool to touch anymore, freeze for 10 minutes before baking. The colder they are going into the oven, the better they'll hold their shape.
  3. Bake for about 28-32 minutes or until they’re golden brown on top and around the edges. Rotate pans halfway through baking. Remove from the oven and allow the hand pies to cool on the baking sheets for 5 minutes, then transfer to a wire rack to cool until ready to handle. 

Filed Under: Desserts

Chicken Marinade

July 19, 2018

This chicken marinade is nice and juicy! Add this chicken marinade to any chicken meal. I make it a lot and it tastes the best when you BBQ the chicken on the grill. I usually grill chicken breasts or you can cut up the breasts and make really good chicken skewers out of them.

 Combine all ingredients and add marinade to the chicken over night to get the best flavoring.

Now fire up that grill and start grilling some chicken! This is 4 chicken breasts.

I suggest to soak the skewers in water for about 20 minutes before you grill.  Grill the chicken for about ten minutes and rotate the skewers so the chicken doesn’t burn.

Serve the chicken with rice and your favorite vegetable.  I added fresh basil to my rice and it was a nice kick to the whole meal.

I hope you enjoy this chicken marinade! I’ve also used the chicken marinade when I baked the chicken in the over or the Instant Pot.  All are great options.

Print

Chicken Marinade

Course Main Course
Keyword Chicken Marinade
Prep Time 10 minutes
Total Time 10 minutes

Ingredients

  • 4 chicken breasts
  • 3/4 cup vegetable oil
  • 1/3 cup soy sauce (less sodium may be used)
  • 1/4 cup worcestershire sauce
  • 1/4 cup red wine vinegar
  • 3 tbsp lemon juice
  • 1 tbsp dry mustard
  • 1 1/4 tsp black pepper

Instructions

  1. In a medium bowl, mix together oil, soy sauce, Worcestershire sauce, wine vinegar, and lemon juice. Stir in mustard powder and pepper. 

  2. Put the 4 chicken breasts in a zip lock bag and pour the marinate all over the chicken. I usually marinate the chicken over night. You can also put the chicken and marinate in a shallow dish.  The longer you marinate, the more flavor it will have.

Filed Under: Grilling

Watermelon Frosé (Frozen Rosé)

July 16, 2018

I love watermelon I mean love it! I usually sit on the couch or sit outside with a huge bowl of watermelon in my lap and demolish at least half of the watermelon. Yes I have issues but I can never stop eating it. Oh wait that’s most food. On a hot summer day I love to drink this watermelon frosé! It’s light and refreshing!

All you need is watermelon and a bottle of Rosè and maybe a splash of vodka.

Easy!

This was a fun recipe to sample. I tried a few versions. My favorite was watermelon, Rosè and a splash of vodka. Cut up some watermelon and freeze it. For the Rosè get two ice cube trays and pour the Rosè into the trays and freeze.

Blend the frozen watermelon and Rosè ice cubes together and you have a refreshing drink. Add a splash of vodka for a kick. Serve the watermelon frosè in a martini glass or a mini watermelon for some fun.

You can also leave the alcohol out and have a watermelon slushie. I think I drank two huge glasses in one sitting of the virgin drink. It’s so good on a hot summer day! Plus the young kids will love it too.

Remember drink responsibly and don’t drink and drive.

Print

Watermelon Frose (Frozen Rose)

Course Drinks
Keyword Watermelon Frose

Ingredients

  • 4 cups frozen watermelon
  • 6 cubes frozen rose

Instructions

  1. Cut up watermelon cubes and put them in plastic freezer bag or container, and freeze overnight or at least 6 hours.

  2. Fill up 2 ice cube trays with the wine and freeze overnight or at least 6 hours.
  3. Place the frozen watermelon and frozen wine cubes in a blender and blend all together.  If it's a little too thick you can add any left over wine or fresh watermelon and it should blend easier. 

  4. Pour into glasses and top with a splash of vodka if you like. 

Recipe Notes

When you blend the frozen watermelon and Rose together use your judgement on how much wine or watermelon to add. You can't make this recipe wrong. You can add more watermelon and less wine or more wine and less watermelon. Make it your own. My recipe is  just an outline. Enjoy!

Filed Under: Drinks

Cake Roll for 4th of July

July 2, 2018

Who doesn’t want a Cake Roll for 4th of July?! The 4th of July is just around the corner and I decided to make a cake roll! This cake roll is fun to make and it’s so patriotic with the red, white and blue colors for the 4th of July.  Let’s get rolling!

This cake roll will add extra pizazz to your 4th of July parties!

Start off my mixing the cake ingredients. I used Duncan Hines classic white cake mix but I’m sure you can use any brand of cake mix.  In the picture below you will also see the Wilton colored paste that I used.

Here is the outcome of the colors once divided up after mixing the cake roll batter.

Here comes the fun part. Pour each batter color into a sandwich bag. Start layers of colored stripes at an angle across the pan. Alternate blue and red until complete. Now Bake!

When it comes out of the oven immediately flip it over onto a new piece of parchment paper. Let it cool for ten minutes.

After 10 mins roll the cake roll.

Once completely rolled put the cake roll in the refrigerator for an hour. It may cool longer than an hour.

Unroll the cake roll and top the cake with the cream cheese frosting. The cake might split when you unroll it but take your time and be careful.  You can cover the splits with the filling.  Once the filling is spread over the cake roll tightly for the last time.

Slice up the cake roll and serve to all your friends and family at your 4th of July BBQ!  Happy 4th!

Print

Cake Roll - 4th of July

Course Dessert
Prep Time 40 minutes
Cook Time 12 minutes
Resting 1 hour
Total Time 52 minutes
Servings 10 slices

Ingredients

Ingredients

Cake

  • 1 box white cake mix
  • 1 cup sugar
  • 1 cup all purpose flour
  • 1 cup water
  • 3 eggs
  • 1 tsp vanilla extract
  • 1 cup plain greek yogurt

Filling

  • 1 package cream cheese 8oz room tempature
  • 1 cup powdered sugar
  • 6 tbsp butter softened
  • 1 tsp vanilla extract

Instructions

  1. In a large mixing bowl, combine cake mix, sugar and flour. Mix to combine.
  2. Add in water, eggs, vanilla extract, and yogurt to the dry ingredients and mix well using an mixer. Mix for approximately two minutes or until well blended

  3. Line the bottom of a 10 x 15-inch jelly roll pan with parchment paper spray the parchment paper with baking spray.

  4. Divide batter equally among 2 bowls.
  5. Use red and blue color paste to each bowl of batter until you get a rich color. Paste will give a darker color than standard coloring. I like to use Wilton paste.
  6. Pour batter into individual sandwich sized zip-lock bags, zip to close.

  7. Snip the tips off the bags and start layers of colored stripes at an angle across one pan. Alternate blue and red until complete. You will have a lot left over batter. Make another cake roll if you wish or make cupcakes with the remaining batter.

  8. Bake for about 10 - 12 minutes.

  9. Immediately flip cakes out of their pans, peel off the parchment paper, flip over onto a clean piece of parchment paper and immediately roll up the cake along with the parchment paper. Let it sit at room temperature for 10 minutes, then refrigerate for one hour or more until cool.

Cream Cheese Filling

  1. Make the filling by beating cream cheese, powdered sugar, butter, and vanilla until well blended.

  2. When the cake is cooled, unroll carefully, peeling the parchment paper off as you go.

  3. Spread the frosting over the top of the cake, then tightly re-roll.

  4. Refrigerate until ready to serve, cut into slices to serve.

Filed Under: Cakes, Desserts

Mini Strawberry Cheesecakes

June 29, 2018

It’s time to get your cheesecake on! Mini Strawberry Cheesecake! It’s that time of year where everyone is making it so why not follow the crowd of cheesecake lovers. If you haven’t noticed from my previous posts I love making mini size portions.


Let’s get started!  Who doesn’t like a graham cracker crust?!  I love this part of the mini strawberry cheesecake. Don’t get me wrong I love the whole thing but when it comes to a crispy flaky crust I just melt.

Insert 9 cupcake liners in the muffin pan and divide the graham cracker crust into each liner.

Next make the cheesecake filling and it will be thick.

Divide the batter into the 9 liners with the graham cracker crust and bake 18 – 20 minutes.

Remove from the oven and let them cool for 30 minutes. Try and resist until they are cooled so you can add the strawberry filling and top with whipped cream.  Add a strawberry to the top too!  ENJOY these mini strawberry cheesecakes! I know you will eat more than one!

Print

Mini Strawberry Cheesecakes

Course Dessert
Prep Time 20 minutes
Cook Time 25 minutes
Resting Time 2 hours 30 minutes
Total Time 45 minutes
Servings 9

Ingredients

Graham Cracker Crust

  • 2/3 cup graham crackers 4-5 sheets
  • 2 tbsp unsalted butter melted
  • 1 tbsp granulated sugar

Cheesecake

  • 8 ounces full fat cream cheese (1 block) at room tempature
  • 1/4 cup granulated sugar
  • 1/4 cup full fat sour cream at room tempature
  • 1/2 tsp pure vanilla extract
  • 1 tsp fresh lemon juice
  • 1 large egg at room tempature

Strawberry Filling

  • 1 & 1/2 tbsp cornstarch
  • 1/4 cup warm water
  • 1 lb fresh strawberries hulled and sliced
  • zest and juice from half of lemon
  • 1/4 cup granulated sugar

Instructions

Graham Cracker Crust

  1. Preheat oven to 350°F (177°C). Line a 12-count muffin pan with 9 liners. This recipe yields only 9 mini cheesecakes, so there will be 3 empty in the pan.
  2. Combine all of the crust ingredients in a medium bowl. Mixture will be sandy. Firmly press a heaping Tablespoon of crust mixture into each liner. (I use closer to 1 and 1/2 Tablespoons of crust per mini cheesecake.) Pre-bake for 5 minutes.

Cheesecake

  1. Using a handheld or stand mixer fitted with a paddle or whisk attachment, beat the cream cheese and granulated sugar together on medium-high speed in a large bowl until the mixture is smooth and creamy, about 1 minute. Add the sour cream, vanilla extract, and lemon juice then beat until fully combined. On medium speed, add the egg and beat just until combined. Batter will be thick. Divide the batter between all the liners. It's about 1 Tablespoon per cheesecake.
  2. Bake until the edges are set and the centers only slightly jiggle, about 18-20 minutes.
  3. Set the pan on a wire rack and allow cheesecakes to cool at room temperature for 30 minutes, then transfer to the refrigerator and chill for 2 hours. The cheesecakes will slightly sink in the middle. It gives you room for toppings!

Strawberry Filling

  1. Whisk the cornstarch and water together in a small pan until all the cornstarch has dissolved over medium heat.
  2. Combine strawberries, zest and lemon juice and sugar in blender. Add the dissolved cornstarch and water into the mixture. Blend all ingredients until smooth. 
  3. Transfer strawberry filling back into the pan and stir over medium heat until it simmers. Reduce heat and let it cool. The sauce should thicken. If it's too thin add a little more cornstarch and stir.
  4. Let the sauce cool completely before adding it to the mini cheesecake. Assemble cheesecake and ENJOY!  Top with whip cream and strawberries!

Filed Under: Desserts

Little Si

May 9, 2018

Living in Seattle and being able to drive 45 minutes to hike has it’s perks!  It’s so great to get out of the busy city and out into the Wilderness.  I try and hike once a week and the first hike this Spring was Little Si in North Bend. I’m so glad it’s lighter later in the evenings so we are able to do this.

It’s a short hike that took us one hour each way.  Remember to always take water with you!


LOCATION

Snoqualmie Region — North Bend Area

View map below

LENGTH

4.7 miles, roundtrip

ELEVATION

Gain: 1300 ft.
Highest Point: 1550 ft.
On our way up it was an easy incline.
   
Reached the top in an hour and it was a nice clear day. We always bring our dinner and rest at the top to enjoy the views. My staple item is PB&J and my homemade trail mix. I will share my trail mix recipe in an upcoming post.
    
Heading back down and had to take this shot. My favorite picture of the night.
There might be a surprise in store for you when hiking. On our way down we saw some people rock climbing. It was really neat to see their talent.  They are so brave!
If you want more information on the hike please comment below and I will answer any questions you might have. Enjoy hiking in the PNW!

Filed Under: Hiking

Pineapple Chicken with Rice

May 8, 2018

Whenever I think of pineapple I think of paradise! Sitting on a beach drinking Pina Coladas all day long. I decided to bring a fresh Pineapple home and prepare Pineapple Chicken with Rice for my family.

I was recently in the store and I was walking through the produce section and noticed that the pineapples were on sale. I thought to myself I need to make a pineapple dish and I bought a couple to experiment with.  I did some research on different types of pineapple dishes and this was my end result. It was so delicious and I even served it to my family that were visiting from out of town. They loved it!

You can also hollow out the pineapple and serve the meal in that! It will be a hit I promise!

Print

Pineapple Chicken with Rice

Course Main Course
Prep Time 20 minutes
Cook Time 15 minutes
Total Time 35 minutes
Servings 4 people

Ingredients

  • 2 pounds Chicken Breast
  • 1 tbsp Olive Oil extra virgin
  • 1/4 cup Pineapple Juice
  • 2 tbsp Low Sodium Soy Sauce may use regular
  • 2 tbsp Chicken Broth
  • 2 tbsp Hoisin Sauce
  • 1/4 cup Brown Sugar may use less if you don't want it too sweet
  • 1 clove Garlic minced
  • 1 tsp cornstarch
  • 1 cup diced pineapple

Instructions

  1. In a medium saucepan, whisk together the pineapple juice, soy sauce, chicken stock, hoisin sauce, brown sugar, garlic and cornstarch. Bring the mixture to a boil and cook until the mixture has reduced to about 1 cup and is the consistency of thick syrup. Set the sauce aside.
  2. Add the olive oil to a large nonstick skillet set over medium-high heat. Add the chicken to the pan and season it with salt and pepper. Cook the chicken, stirring, until it is no longer pink, about 5 minutes. Drain off any liquids then add the sauce to the pan and stir until combined. Add the pineapple and cook, stirring, for an additional 1 minute.

  3. Serve over rice

Filed Under: Everyday Meals

Coffee Cake

May 6, 2018

Coffee Cake is one of my all time favorite morning treats. It sure is delightful with a hot cup of coffee or tea.

Every time I walk into a coffee shop I stare at the pastry case and I want to shovel all their coffee cake into my mouth!  I decided to try and make my own.   I pretty much ate the entire pan in one weekend. Let’s say I can’t keep this around.  I hope you enjoy this as much as I did!


Print

Coffee Cake

Course Breakfast
Prep Time 15 minutes
Cook Time 30 minutes
Total Time 45 minutes
Servings 8

Ingredients

Cake

  • 1 package Yellow Cake Mix mix only, not prepared
  • 1 cup Plain Greek Yogurt
  • 1/4 cup Butter
  • 1 tsp Vanilla Extract

Crumble topping

  • 1 1/4 cups Flour
  • 2/3 cup Brown Sugar
  • 1/2 cup Sugar
  • 1 tsp Cinnamon
  • 1/2 cup Butter chilled & cut into cubes

Instructions

  1. Preheat oven to 350 and grease a 9 x13 inch baking dish with cooking spray.

  2. Prepare the cake. Combine cake mix, egg, greek yogurt, melted butter, and vanilla and mix until combined. It's okay if the batter still has some lumps.

  3. To make the crumble. Whisk together flour, brown sugar, sugar, salt, and cinnamon. Cut in chilled butter until crumbly. Set aside. 

  4. Spoon half the cake batter in the bottom of the greased baking dish. Take half of the crumble mixture and evenly sprinkle over the first layer of batter. Grease a rubber spatula and gently spread the remaining batter over the crumble (see note). Top with remaining crumble.

  5. Bake for 30-35 minutes until an inserted toothpick comes out clean. Serve warm.

Recipe Notes

This takes a little finessing but it's worth it if you just work with it. If you don't want to worry about working with the batter (which is thick) to make the layers, you can spread all of the batter in the pan, then top with all of the crumble and bake as directed.


Filed Under: Desserts

  • « Go to Previous Page
  • Page 1
  • Interim pages omitted …
  • Page 6
  • Page 7
  • Page 8
  • Page 9
  • Go to Next Page »

Primary Sidebar

Hello and Welcome

Hi! I'm Holly and welcome to my personal blog and thank you for taking the time to look through my recipes and hiking adventures. I hope you enjoy them as much as me. Stay connected to see upcoming blog posts! I'm excited to have you join!

Recent Posts

  • Sourdough Focaccia
  • Andes Mint Truffles
  • Cole Slaw
  • Pumpkin Spice Cupcakes
  • Chicken Tortilla Soup

Archives

  • October 2024
  • December 2023
  • October 2023
  • August 2022
  • April 2022
  • February 2022
  • January 2021
  • May 2020
  • April 2020
  • February 2020
  • November 2019
  • October 2019
  • August 2019
  • July 2019
  • June 2019
  • May 2019
  • April 2019
  • March 2019
  • February 2019
  • January 2019
  • December 2018
  • November 2018
  • October 2018
  • September 2018
  • August 2018
  • July 2018
  • June 2018
  • May 2018

Categories

Don’t Miss These!

Spritz Cookies

Coffee Cake

Sourdough Focaccia

Snickerdoodle Truffles

Most Popular Recipes

Peanut Butter Brownies

Tomato Soup

Footer

My Favorites

stay connected

  • Facebook
  • Instagram
  • Pinterest

Don’t miss a recipe or an adventure!

Copyright© 2025 · Brunch Pro Theme by Feast Design Co.