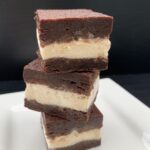
The weather is getting nicer here in Seattle and that should call for Ice Cream Sandwiches. These remind me of grade school at our lunch break and we got to gobble these down and we were so excited. I still get excited for ice cream sandwiches. They are great cooling treat! Simple to make.

This recipe might seem overwhelming but they are worth it and you can save them for weeks in the freezer.

See the recipe and start baking! They will not disappoint.
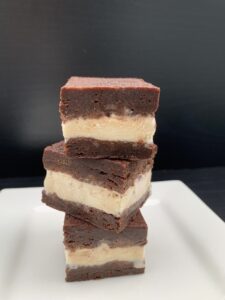
Enjoy sinking your teeth into these refreshing homemade ice cream sandwiches!!
Ice Cream Sandwiches
Ingredients
- 1 cup 2 sticks unsalted butter
- 2 cups granulated sugar
- 3 large eggs at room temperature
- 1 tbsp pure vanilla extract
- 1 cup unsweetened natural or dutch-process cocoa powder
- 1 cup all-purpose flour (spoon & leveled)
- 1 tsp salt
- 3/4 tsp baking powder
- 1/2 gallon vanilla ice cream (slightly softened– you can use any flavor and you may some leftover)
Instructions
-
Preheat the oven to 350°F (177°C) and line a 9-inch square baking pan with parchment paper, leaving enough overhang on the sides to lift the warm brownies out. Set aside. (If you have 2 9-inch square baking pans, you can bake the batches of brownie batter at the same time.)
-
In a microwave-safe bowl or a saucepan on the stove, melt the butter. After melting, whisk in the sugar until completely combined, then whisk in the eggs and vanilla.
-
Add the cocoa powder, flour, salt, and baking powder. Mix all together with a rubber spatula or wooden spoon. Batter will be very thick. You will have about 4 cups of batter.
-
Spoon and spread half of the batter (about 2 cups) into prepared pan. (Lightly cover remaining batter and keep at room temperature if you don't have two pans.) The batter will be thick and heavy, so do your best to spread it evenly in the lined baking pan. Place a small sheet of parchment paper directly on top of the brownie batter, smoothing it down. The top parchment paper helps the brownies stay flat and prevents the brownies from puffing up too much.
-
Bake for 15-16 minutes. Do not bake over 16 minutes (they may harden over time if you over cook them). Remove brownies from the oven and cool for 5 minutes in the pan. Carefully, using the overhanging parchment paper on the sides, lift the warm and soft square sheet of brownies out of the pan as a whole. Remove top piece of parchment. (You can reuse it for the top of the 2nd sheet of brownies in the next step, if desired.) Set aside.
-
Line the warm pan with another sheet of parchment paper, leaving enough overhang on the sides to lift the warm brownies out. Give the remaining brownie batter a stir. It will be very thick at this point. Add a teaspoon of water to thin out if necessary. (No more.) Spoon and spread the remaining brownie batter in the pan. Place a small sheet of parchment paper directly on top of the brownie batter, just as you did before.
-
Bake for 15-16 minutes. Remove brownies from the oven and cool for 15 minutes in the pan. During this cooling time, I remove the ice cream from the freezer so it has a chance to soften.
-
Scoop the softened ice cream onto the warm brownie layer in the pan. You’ll use almost all of the 1/2 gallon of ice cream. Using the back of a spoon or your ice cream scoop, gently spread it into an even and thick layer.
-
Carefully pick up the 1st square sheet of brownies and place on top of the ice cream layer. Gently press it down into the ice cream to help it stick. Cover the entire pan with aluminum foil or plastic wrap and freeze for at least 12 hours and up to 1 week.
-
Remove the pan of ice cream brownies from the freezer. Carefully lift them out as a whole using the parchment paper overhang on the sides. Using a very sharp knife and some arm muscle, cut into 8-12 squares or rectangles.
-
Wrap each leftover sandwich individually and store in the freezer for up to 1 month.


