• Skip to primary navigation
  • Skip to main content
  • Skip to primary sidebar
  • Skip to footer
  • Home
  • Recipes
  • Hiking
  • Contact

Holly in the PNW

The girl that can't sit still!

Desserts

Mini Strawberry Cheesecakes

June 29, 2018

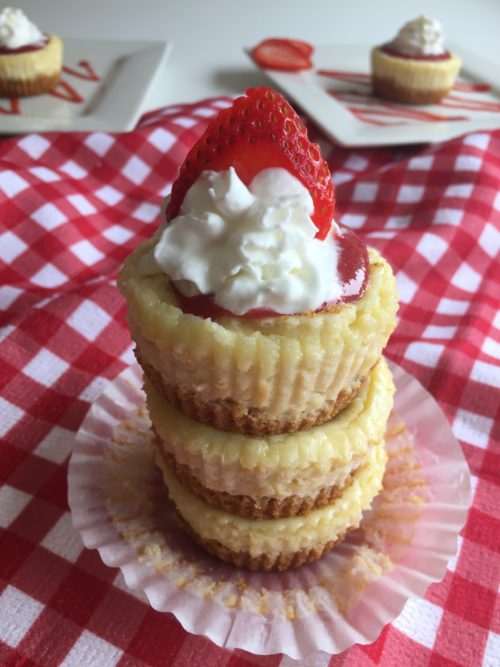
It’s time to get your cheesecake on! Mini Strawberry Cheesecake! It’s that time of year where everyone is making it so why not follow the crowd of cheesecake lovers. If you haven’t noticed from my previous posts I love making mini size portions.


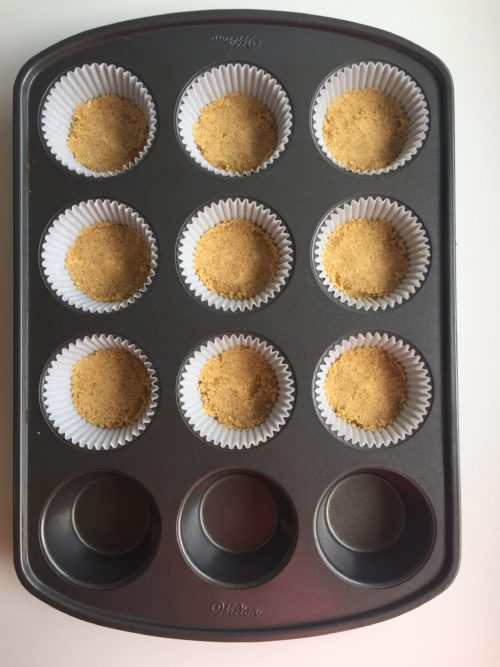
Let’s get started!  Who doesn’t like a graham cracker crust?!  I love this part of the mini strawberry cheesecake. Don’t get me wrong I love the whole thing but when it comes to a crispy flaky crust I just melt.

Insert 9 cupcake liners in the muffin pan and divide the graham cracker crust into each liner.

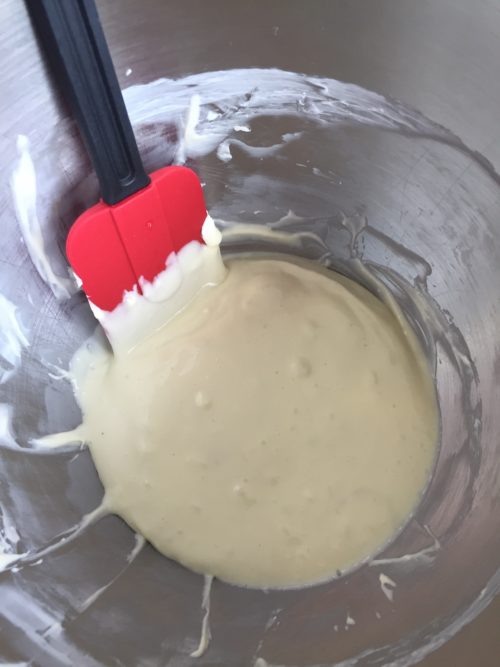
Next make the cheesecake filling and it will be thick.

Divide the batter into the 9 liners with the graham cracker crust and bake 18 – 20 minutes.

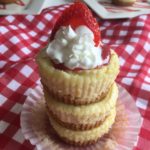
Remove from the oven and let them cool for 30 minutes. Try and resist until they are cooled so you can add the strawberry filling and top with whipped cream.  Add a strawberry to the top too!  ENJOY these mini strawberry cheesecakes! I know you will eat more than one!

Print

Mini Strawberry Cheesecakes

Course Dessert
Prep Time 20 minutes
Cook Time 25 minutes
Resting Time 2 hours 30 minutes
Total Time 45 minutes
Servings 9

Ingredients

Graham Cracker Crust

  • 2/3 cup graham crackers 4-5 sheets
  • 2 tbsp unsalted butter melted
  • 1 tbsp granulated sugar

Cheesecake

  • 8 ounces full fat cream cheese (1 block) at room tempature
  • 1/4 cup granulated sugar
  • 1/4 cup full fat sour cream at room tempature
  • 1/2 tsp pure vanilla extract
  • 1 tsp fresh lemon juice
  • 1 large egg at room tempature

Strawberry Filling

  • 1 & 1/2 tbsp cornstarch
  • 1/4 cup warm water
  • 1 lb fresh strawberries hulled and sliced
  • zest and juice from half of lemon
  • 1/4 cup granulated sugar

Instructions

Graham Cracker Crust

  1. Preheat oven to 350°F (177°C). Line a 12-count muffin pan with 9 liners. This recipe yields only 9 mini cheesecakes, so there will be 3 empty in the pan.
  2. Combine all of the crust ingredients in a medium bowl. Mixture will be sandy. Firmly press a heaping Tablespoon of crust mixture into each liner. (I use closer to 1 and 1/2 Tablespoons of crust per mini cheesecake.) Pre-bake for 5 minutes.

Cheesecake

  1. Using a handheld or stand mixer fitted with a paddle or whisk attachment, beat the cream cheese and granulated sugar together on medium-high speed in a large bowl until the mixture is smooth and creamy, about 1 minute. Add the sour cream, vanilla extract, and lemon juice then beat until fully combined. On medium speed, add the egg and beat just until combined. Batter will be thick. Divide the batter between all the liners. It's about 1 Tablespoon per cheesecake.
  2. Bake until the edges are set and the centers only slightly jiggle, about 18-20 minutes.
  3. Set the pan on a wire rack and allow cheesecakes to cool at room temperature for 30 minutes, then transfer to the refrigerator and chill for 2 hours. The cheesecakes will slightly sink in the middle. It gives you room for toppings!

Strawberry Filling

  1. Whisk the cornstarch and water together in a small pan until all the cornstarch has dissolved over medium heat.
  2. Combine strawberries, zest and lemon juice and sugar in blender. Add the dissolved cornstarch and water into the mixture. Blend all ingredients until smooth. 
  3. Transfer strawberry filling back into the pan and stir over medium heat until it simmers. Reduce heat and let it cool. The sauce should thicken. If it's too thin add a little more cornstarch and stir.
  4. Let the sauce cool completely before adding it to the mini cheesecake. Assemble cheesecake and ENJOY!  Top with whip cream and strawberries!

Filed Under: Desserts

Coffee Cake

May 6, 2018

Coffee Cake is one of my all time favorite morning treats. It sure is delightful with a hot cup of coffee or tea.

Every time I walk into a coffee shop I stare at the pastry case and I want to shovel all their coffee cake into my mouth!  I decided to try and make my own.   I pretty much ate the entire pan in one weekend. Let’s say I can’t keep this around.  I hope you enjoy this as much as I did!


Print

Coffee Cake

Course Breakfast
Prep Time 15 minutes
Cook Time 30 minutes
Total Time 45 minutes
Servings 8

Ingredients

Cake

  • 1 package Yellow Cake Mix mix only, not prepared
  • 1 cup Plain Greek Yogurt
  • 1/4 cup Butter
  • 1 tsp Vanilla Extract

Crumble topping

  • 1 1/4 cups Flour
  • 2/3 cup Brown Sugar
  • 1/2 cup Sugar
  • 1 tsp Cinnamon
  • 1/2 cup Butter chilled & cut into cubes

Instructions

  1. Preheat oven to 350 and grease a 9 x13 inch baking dish with cooking spray.

  2. Prepare the cake. Combine cake mix, egg, greek yogurt, melted butter, and vanilla and mix until combined. It's okay if the batter still has some lumps.

  3. To make the crumble. Whisk together flour, brown sugar, sugar, salt, and cinnamon. Cut in chilled butter until crumbly. Set aside. 

  4. Spoon half the cake batter in the bottom of the greased baking dish. Take half of the crumble mixture and evenly sprinkle over the first layer of batter. Grease a rubber spatula and gently spread the remaining batter over the crumble (see note). Top with remaining crumble.

  5. Bake for 30-35 minutes until an inserted toothpick comes out clean. Serve warm.

Recipe Notes

This takes a little finessing but it's worth it if you just work with it. If you don't want to worry about working with the batter (which is thick) to make the layers, you can spread all of the batter in the pan, then top with all of the crumble and bake as directed.


Filed Under: Desserts

Chocolate Cake Pops

May 1, 2018

Chocolate Cake Pops are the perfect dessert if you don’t want to binge on eating a lot of cake. Bite size means personal size! But you can eat more than one of these chocolate cake pops. Trust me I ate more than one.

Get ready to have some fun making these chocolate cake pops.  It’s a process but it’s fun from the beginning and they turn out delicious.  I couldn’t believe how perfect the ratio was between the cake and frosting. My mouth is watering as I type this cause I want to eat more!

Chocolate cake pops are fun to decorate anyway you want.  I used two different types of sprinkles but you can use anything to make them your way. Get creative! Sprinkles, dust powder, mini candies and you can even get other colors in the coating to make swirl shapes with different colors.

These are great as a gift and even take them to your next party. Wrap them up in cellophane mini bags and tie them with ribbon. People will love you after they eat these chocolate cake pops!


Print

Chocolate Cake Pops

Course Dessert
Prep Time 1 hour
Resting time 2 hours
Servings 40 cake pops

Ingredients

  • 1 cup all-purpose flour spoon & level
  • 1 cup granulated sugar
  • 6 tbsp unsweetened natural cocoa powder
  • 1/2 tsp baking soda
  • 1/4 tsp salt
  • 1/2 cup vegtable oil
  • 2 large eggs at room tempature
  • 1/2 cup hot water

Chocolate Frosting

  • 6 tbsp unsalted butter soften, at room tempature
  • 3/4 cup confectioners' sugar
  • 1/2 cup unsweetened natural cocoa powder
  • 2-3 tsp heavy cream or milk
  • 1/2 tsp pure vanilla extract

Chocolate Coating

  • 12 ounces candy melts or coating
  • sprinkles
  • lollipop sticks

Instructions

  1. Preheat oven to 350°F (177°C). Grease a 9-inch pan (round or square)

Chocolate Cake

  1. Whisk the flour, granulated sugar, cocoa powder, baking soda, and salt together in a large bowl. Set aside. Whisk the oil, eggs, and vanilla together in a medium bowl. Pour the wet ingredients into the dry ingredients, add the hot water, and whisk everything together until combined. Make sure there are no pockets of dry ingredients hiding.
  2. Pour the batter evenly into the prepared pan. Bake for 25-27 minutes or until a toothpick inserted in the center comes out clean. Allow the cake to cool completely in the pan set on a wire rack.

Choloate Frosting

  1. With a handheld or stand mixer fitted with a paddle attachment, beat the butter on medium speed until creamy, about 2 minutes. This isn't a lot of butter and it will get stuck on the sides of the bowl, so you may need to scrape down the sides of the bowl with a rubber spatula to really help get it creamed. Add confectioners' sugar, cocoa powder, 2 teaspoons of heavy cream/milk, and vanilla extract with the mixer running on low. Increase to high speed and beat for 3 minutes until it really comes together. Add another teaspoon of milk/cream if it looks a little too thick.

  2. Crumble the cooled cake into the bowl on top of the frosting. Make sure there are no large lumps. Turn the mixer on low and beat the frosting and cake crumbles together until combined.
  3. Measure 1 scant Tablespoon of moist cake mixture and roll into a ball. Place balls on a lined baking sheet. Refrigerate for 2 hours or freeze for 1 hour.
  4. Melt the coating in a 2-cup liquid measuring cup (best for dunking!). Use a microwave or you can use a double boiler and pour some at a time into the liquid measuring cup. Let the coating cool down for a few minutes before you begin dipping. If it's too hot when you dip, the coating will crack.

Coat the cake balls

  1. Remove only 2-3 cake balls from the refrigerator at a time. (Keep the rest cold!) Dip a lollipop stick about 1/2 inch into the coating, then insert into the center or the cake ball. Only push it about halfway - 3/4 through the cake ball. Dip the cake ball into the coating until it is completely covered. Make sure the coating covers the base of the cake ball where it meets the lollipop stick. Very gently tap the stick against the edge of the measuring cup to allow excess coating to drop off. Decorate the top with sprinkles and place upright into a styrofoam block, box (flip the box upside down and poke the lollipops into the bottom of the box) or even tall shot glasses work. Repeat with remaining cake balls, only working with some out of the refrigerator at a time. The cake balls must be very cold when dipping!

  2. Coating will set within an hour. Store cake pops in the refrigerator for up to 1 week. You may freeze the cake pops up to 3 months.

Recipe Notes

If you don't want to use a lollipop stick you can always use a toothpick to dip the cake balls into the coating but make sure to stick the toothpick all the way in so it can hold the weight of the ball while dipping.

Filed Under: Desserts

Vanilla Naked Cake with Raspberry Filling

May 1, 2018

Vanilla Naked Cake with Raspberry Filling will make any Easter a better one! Making this will make everyone’s belly extremely happy after your home cooked meal. This cake is heavy and delightful and it won’t disappoint.

Three layers of vanilla naked cake with raspberry filling and vanilla frosting between each layer.

I dyed hard boiled eyes with shaving cream and food coloring to add decorations to the vanilla naked cake. This is a great project for kids.  Dyed Eggs

You can decorate naked cakes with several options such as edible flowers, berries, nuts, seeds, fresh herbs, sprinkles or anything you can think of. I even used edible green Easter grass that I found at my local Fred Meyer.

This was probably one of the best cakes I’ve made. It was moist and dense at the same time with great flavoring. Be prepared to eat more than one piece!


Print

Vanilla Naked Cake with Raspberry Filling

Course Dessert
Prep Time 45 minutes
Cook Time 25 minutes
Total Time 6 hours
Servings 12 servings

Ingredients

Cake

  • 3 3/4 cups all purpose flour sifted
  • 1 tsp baking powder
  • 3/4 tsp baking soda
  • 1 tsp salt
  • 1 1/2 cups unsalted butter room temperature
  • 2 cups granulated sugar
  • 5 large eggs room temperature
  • 1 tbsp pure vanilla extract
  • 1 3/4 cups buttermilk room temperature

Vanilla Buttercream

  • 1 1/2 cups unsalted butter room temperature
  • 5 - 6 cups confectioners' sugar
  • 5 - 6 tbsp heavy cream
  • 1 tsp pure vanilla extract

Raspberry Filling

  • 8 ounces fresh raspberries or frozen
  • 1 tbsp water
  • 3 tbsp granulated sugar
  • 1 tbsp cornstarch
  • 1/4 cup water

Instructions

Making the Cake

  1. Preheat oven to 350°F (177°C). Grease and lightly flour three 9-inch cake pan.

  2. Whisk the flour, baking powder, baking soda, and salt together in a large bowl. Set aside.
  3. Using a handheld or stand mixer fitted with a paddle or whisk attachment, beat the butter and sugar together on high speed until smooth and creamy, about 3 minutes. Scrape down the sides and up the bottom of the bowl with a rubber spatula as needed. 
  4. On medium-high speed, add 1 egg at a time, beating well after each addition. Beat in the vanilla extract. Scrape down the sides and up the bottom of the bowl with a rubber spatula as needed. 

  5. With the mixer on low speed, add the dry ingredients in three additions alternating with the buttermilk, beginning and ending with the dry ingredients, and mixing each addition just until incorporated. Do not overmix this batter. The batter will be smooth, velvety, and slightly thick.
  6. There is about 8 cups of batter total, so each layer will be 2 and 2/3 cups. Pour/spread batter evenly into prepared cake pans. 

  7. Bake for around 25-26 minutes or until the cakes are baked through. To test for doneness, insert a toothpick into the center of the cake. If it comes out clean, it is done. Allow cakes to cool completely in the pans set on a wire rack. The cakes must be completely cool before frosting and assembling.

Making the Buttercream Frosting

  1. In a large bowl using a hand-held mixer or stand mixer fitted with a whisk or paddle attachment, beat the butter on medium speed until creamy - about 2 minutes. 

  2. With the mixer running on low, add 5 and 1/2 cups confectioners' sugar, 5 tablespoons heavy cream, and the vanilla extract. Increase to high speed and beat for 3 full minutes. 

  3. Add 1/2 cup more confectioners' sugar if frosting is too thin, 1 more tablespoon cream if frosting is too thick. 

  4. Yields about 4.5 cups of frosting.

Making the Raspberry Filling

  1. Place raspberries, 1 tablespoon water, and white sugar in a blender and pulse several times to chop raspberries; blend until pureed, about 30 seconds.
  2. Whisk cornstarch with 1/4 cup water until thoroughly combined; pour mixture into the raspberry mixture in the blender and blend again until smooth.
  3. Pour raspberry mixture into a saucepan and simmer over low heat until thickened, about 5 minutes. Let the raspberry filling cool.

Assemble and decorate the cake:

  1. First, using a large serrated knife, slice a thin layer off the tops of the cakes to create a flat surface. Discard or save and eat later.  

  2. Place 1 cake layer on your cake stand, cake turntable, or serving plate. Spread 1 and 1/2 cups of frosting evenly on top. Spread the raspberry filling right on top of the frosting (several spoonfuls) until the frosting is covered with the filling. Use your own judgement on how much to use. 

  3. Top with 2nd cake layer and evenly cover the top with another 1 and 1/2 cups of frosting and more raspberry filling. 

  4. Top with the third cake layer. Spread the remaining frosting on top and all around the sides using an icing spatula.
  5. Use a bench scraper to smooth out the frosting on the sides of the cake. 

  6. Decorate the cake with garnishes.
  7. Refrigerate the cake for 2-3 hours or up to 1 day before slicing and serving. If chilling for more than a few hours, loosely cover with plastic wrap after 1 hour of refrigeration (the frosting will "set" after about 1 hour and the plastic wrap won't really ruin your frosting at that point). And if you're chilling for more than a few hours, I suggest decorating with garnishes right before serving.

  8. Cover and store leftover cake at room temperature for 1-2 days or in the refrigerator for up to 1 week.

Recipe Notes

6 hours of total time includes resting time for the cake and raspberry filling to completely cool. 

Filed Under: Cakes, Desserts

  • « Go to Previous Page
  • Page 1
  • Interim pages omitted …
  • Page 4
  • Page 5
  • Page 6

Primary Sidebar

Hello and Welcome

Hi! I'm Holly and welcome to my personal blog and thank you for taking the time to look through my recipes and hiking adventures. I hope you enjoy them as much as me. Stay connected to see upcoming blog posts! I'm excited to have you join!

Recent Posts

  • Sourdough Focaccia
  • Andes Mint Truffles
  • Cole Slaw
  • Pumpkin Spice Cupcakes
  • Chicken Tortilla Soup

Archives

  • October 2024
  • December 2023
  • October 2023
  • August 2022
  • April 2022
  • February 2022
  • January 2021
  • May 2020
  • April 2020
  • February 2020
  • November 2019
  • October 2019
  • August 2019
  • July 2019
  • June 2019
  • May 2019
  • April 2019
  • March 2019
  • February 2019
  • January 2019
  • December 2018
  • November 2018
  • October 2018
  • September 2018
  • August 2018
  • July 2018
  • June 2018
  • May 2018

Categories

Don’t Miss These!

Pumpkin Cheese Ball

Mini Strawberry Cheesecakes

Chocolate Almond Cookie Pudding Cups

Chocolate Chip Cookie Cake

Most Popular Recipes

Circus Cookies

Cat Cake

Footer

My Favorites

stay connected

  • Facebook
  • Instagram
  • Pinterest

Don’t miss a recipe or an adventure!

Copyright© 2025 · Brunch Pro Theme by Feast Design Co.