• Skip to primary navigation
  • Skip to main content
  • Skip to primary sidebar
  • Skip to footer
  • Home
  • Recipes
  • Hiking
  • Contact

Holly in the PNW

The girl that can't sit still!

Search Results for: Cake roll

Red Velvet Cake Roll

September 6, 2018

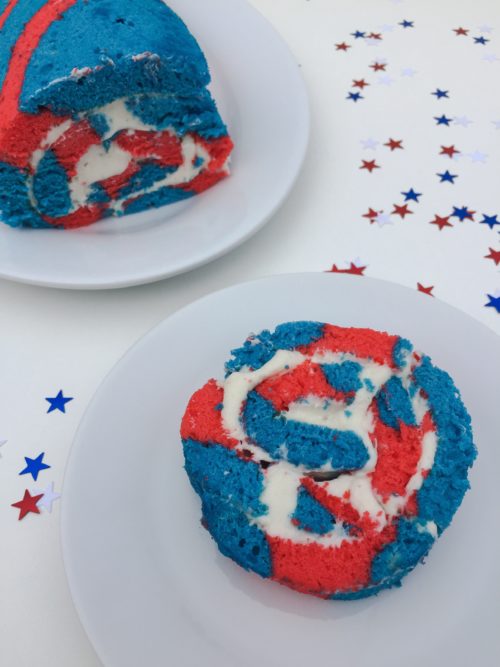
It was my friend’s birthday and we both love red velvet cake so I thought I would try to master my cake rolling skills. These cake rolls are a bit finicky. So I decided to make this red velvet cake roll and see if my rolling skills were better than my last one that I made it July.

Make your red velvet cake batter as per instructions. Let it cool and roll it up. Some recipes say to use a thin towel which I did this time around but I think parchment paper works better. I didn’t get step by step pictures because I have a 4th of July Cake Roll that has them. Click the link on how to roll the red velvet cake roll. 4th of July Cake Roll

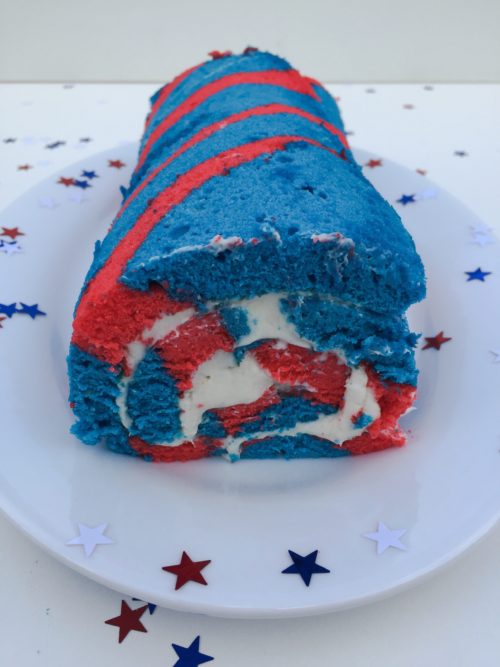
While the cake is cooling make the cream cheese frosting. Once the cake is cooled unroll it and apply the cream cheese frosting on top of the red velvet cake roll. Roll it back up without the towel or parchment paper. Don’t get discourage if the cake breaks it will still roll up nicely and the cream cheese frosting will keep it all together.

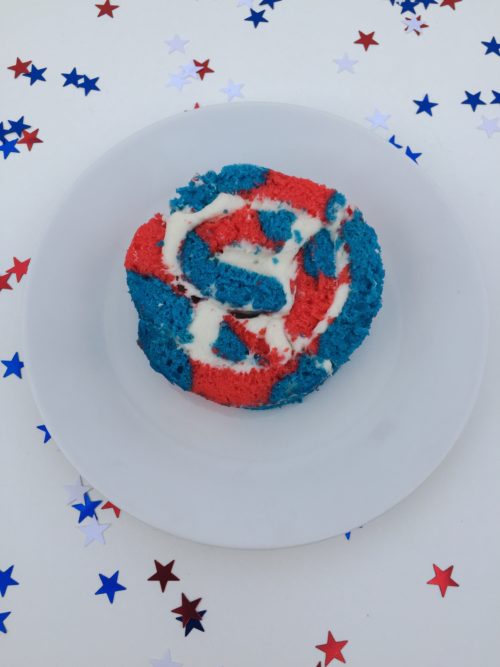
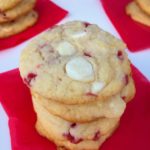
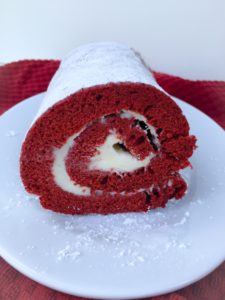
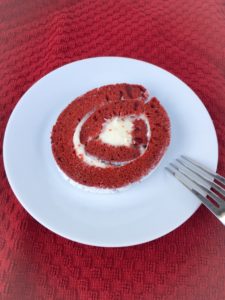
Add more powdered sugar to the top of the roll if you want. Slice up the red velvet cake roll and share away. People loved the cake roll idea when I served it at the birthday party.


Print

Red Velvet Cake Roll

Course Dessert
Keyword Red Velvet Cake Roll
Servings 12 slices

Ingredients

Ingredients:

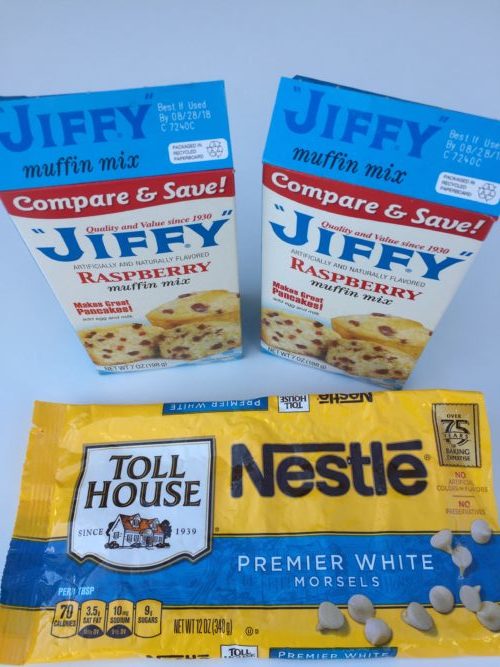
  • 1 cup minus 1 Tablespoon all-purpose flour
  • 3 tbsp unsweetened natural cocoa powder
  • 1 tsp baking powder
  • 1/2 tsp salt
  • 4 large eggs room temperature
  • 1/2 cup granulated sugar
  • 1/4 cup packed light brown sugar
  • 2 tbsp vegetable oil
  • 2 tbsp milk
  • 1 tsp white vinegar helps the red color stand out
  • 1 tbsp red food coloring or paste
  • 2 tsp pure vanilla extract

For Rolling

  • 1 cup confectioners' sugar

Cream Cheese Frosting

  • 6 ounces block cream cheese softened to room temperature
  • 1/4 cup unsalted butter softened to room temperature
  • 1 3/4 cups confectioners' sugar
  • 1 tsp pure vanilla extract

Instructions

Directions: Read all instructions before starting

  1. Preheat oven to 350°F. Spray a 10x15 inch baking pan with nonstick spray so the parchment paper sticks. Then line it with parchment paper so the cake seamlessly releases when it's done. Spray or grease the parchment paper too.

  2. Sift the flour, cocoa powder, baking powder, and salt together. Set aside.

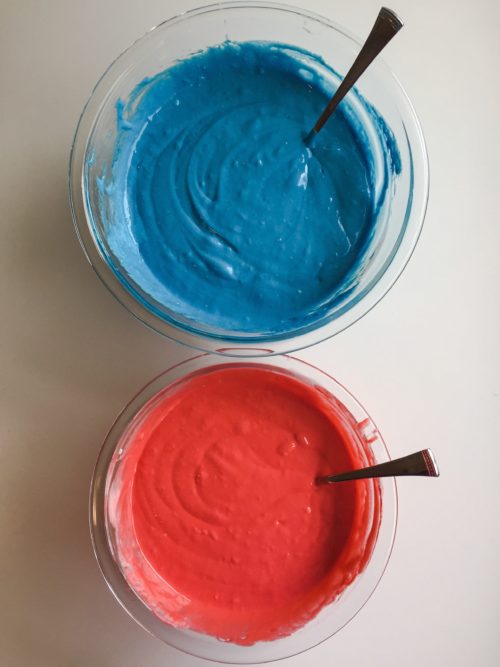
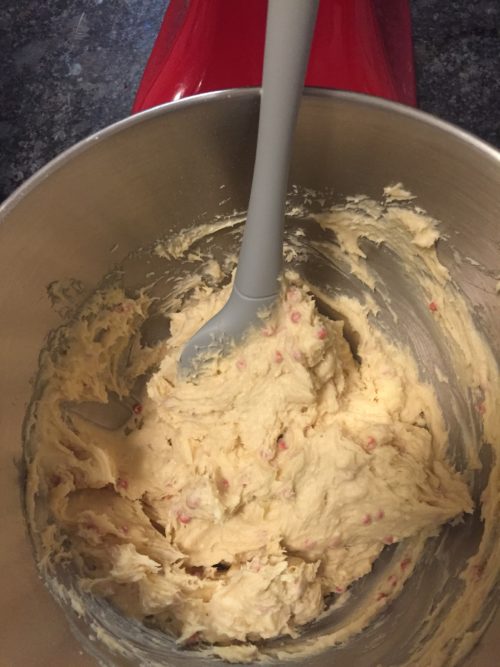
  3. Using a hand mixer or a stand mixer fitted with whisk attachment, beat the eggs for 5 minutes on high speed. They will be light and very fluffy. On medium speed, beat in the granulated sugar, brown sugar, oil, milk, vinegar, food coloring, and vanilla until combined. 

  4. Stop the mixer, pour in the sifted dry ingredients, then beat on low until the batter is completely combined.

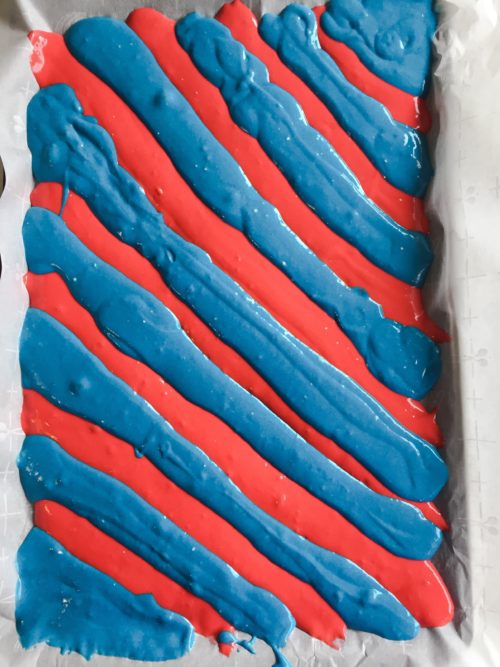
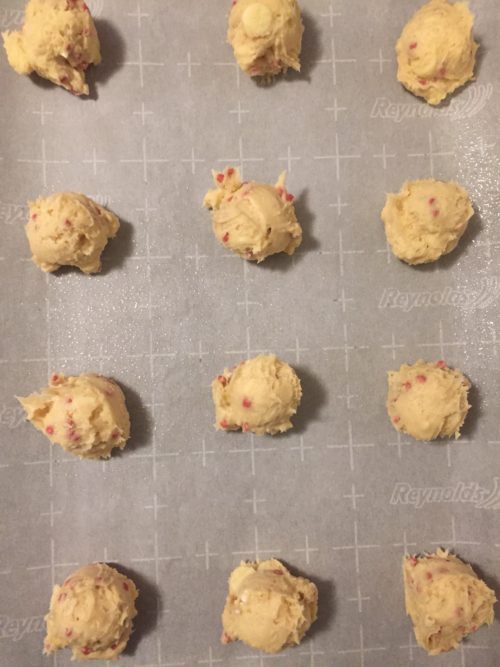
  5. Spread batter evenly into prepared pan. Give the pan a shake to make sure the batter is level and reaches the corners. Bake for 17 minutes or until the cake springs back when you poke it with a finger.
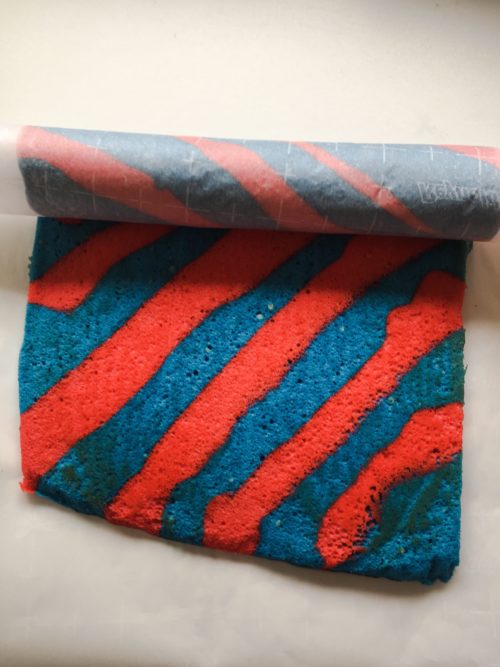
  6. Meanwhile, lay a thin kitchen towel or parchment paper flat on the counter. Sprinkle with 1 cup of confectioners' sugar. Once the cake comes out of the oven, immediately invert it onto the towel or parchment paper. Peel off the parchment paper then, starting with the narrow end, begin rolling the cake up with the towel. Do this slowly and gently. The cake will be warm as it just came out of the oven.

  7. Allow the cake to cool completely rolled up in the towel or parchment paper.

  8. Make the frosting: In a large bowl using a hand-held or stand mixer fitted with a paddle or whisk attachment, beat the cream cheese for 1 minute on high speed until completely smooth and creamy. Beat in the butter until combined. Add the confectioners' sugar and vanilla and beat on medium-high speed until combined and creamy.
  9. Gently and slowly unroll the cake. Flatten it out and spread frosting evenly on top, leaving about a 1/2 inch border around the cake. Gently and slowly roll the cake back up, without the towel or parchment paper this time. Make sure you're rolling it tightly. Some frosting may spill out the sides.

  10. Dust with more confectioners' sugar, if desired.

Filed Under: Cakes, Desserts

Cake Roll for 4th of July

July 2, 2018

Who doesn’t want a Cake Roll for 4th of July?! The 4th of July is just around the corner and I decided to make a cake roll! This cake roll is fun to make and it’s so patriotic with the red, white and blue colors for the 4th of July.  Let’s get rolling!

This cake roll will add extra pizazz to your 4th of July parties!

Start off my mixing the cake ingredients. I used Duncan Hines classic white cake mix but I’m sure you can use any brand of cake mix.  In the picture below you will also see the Wilton colored paste that I used.

Here is the outcome of the colors once divided up after mixing the cake roll batter.

Here comes the fun part. Pour each batter color into a sandwich bag. Start layers of colored stripes at an angle across the pan. Alternate blue and red until complete. Now Bake!

When it comes out of the oven immediately flip it over onto a new piece of parchment paper. Let it cool for ten minutes.

After 10 mins roll the cake roll.

Once completely rolled put the cake roll in the refrigerator for an hour. It may cool longer than an hour.

Unroll the cake roll and top the cake with the cream cheese frosting. The cake might split when you unroll it but take your time and be careful.  You can cover the splits with the filling.  Once the filling is spread over the cake roll tightly for the last time.

Slice up the cake roll and serve to all your friends and family at your 4th of July BBQ!  Happy 4th!

Print

Cake Roll - 4th of July

Course Dessert
Prep Time 40 minutes
Cook Time 12 minutes
Resting 1 hour
Total Time 52 minutes
Servings 10 slices

Ingredients

Ingredients

Cake

  • 1 box white cake mix
  • 1 cup sugar
  • 1 cup all purpose flour
  • 1 cup water
  • 3 eggs
  • 1 tsp vanilla extract
  • 1 cup plain greek yogurt

Filling

  • 1 package cream cheese 8oz room tempature
  • 1 cup powdered sugar
  • 6 tbsp butter softened
  • 1 tsp vanilla extract

Instructions

  1. In a large mixing bowl, combine cake mix, sugar and flour. Mix to combine.
  2. Add in water, eggs, vanilla extract, and yogurt to the dry ingredients and mix well using an mixer. Mix for approximately two minutes or until well blended

  3. Line the bottom of a 10 x 15-inch jelly roll pan with parchment paper spray the parchment paper with baking spray.

  4. Divide batter equally among 2 bowls.
  5. Use red and blue color paste to each bowl of batter until you get a rich color. Paste will give a darker color than standard coloring. I like to use Wilton paste.
  6. Pour batter into individual sandwich sized zip-lock bags, zip to close.

  7. Snip the tips off the bags and start layers of colored stripes at an angle across one pan. Alternate blue and red until complete. You will have a lot left over batter. Make another cake roll if you wish or make cupcakes with the remaining batter.

  8. Bake for about 10 - 12 minutes.

  9. Immediately flip cakes out of their pans, peel off the parchment paper, flip over onto a clean piece of parchment paper and immediately roll up the cake along with the parchment paper. Let it sit at room temperature for 10 minutes, then refrigerate for one hour or more until cool.

Cream Cheese Filling

  1. Make the filling by beating cream cheese, powdered sugar, butter, and vanilla until well blended.

  2. When the cake is cooled, unroll carefully, peeling the parchment paper off as you go.

  3. Spread the frosting over the top of the cake, then tightly re-roll.

  4. Refrigerate until ready to serve, cut into slices to serve.

Filed Under: Cakes, Desserts

Number Cookie Cake

May 1, 2020

Today my blog turns 2! I can’t believe it’s been 2 years since I started my blog. It sure has been a fun and great hobby and I have been so happy to share my recipes with all of YOU! Thank you to everyone for following my blog and making my recipes. There will be many more to come!

Since we have to stay at home because of the pandemic a lot of people are cooking and baking a lot more. I know I sure have been! We are all in this together and one day things will calm down and we will be back to normal. In the meantime, we can try new recipes at home!

Let’s get started with a Number Cookie Cake. I love sugar cookies and this is the base of this number cookie cake. I could eat sugar cookies all day long!

I have a good friend that owns a cookie business so I reached out to her for her sugar cookie recipe, so you know these are going to be top notch. Soft sugar cookies are the only way to go, so I knew she would be a great resource.  She does marvelous and stunning work. It blows me away how talented she is. Her business is called M&T Sweet Treats. You can find her on Facebook and on Instagram!

Let’s get started with the cookie base. Combine butters and sugar until smooth. Add eggs one at a time and vanilla until incorporated. Mix flour, baking powder and salt. Divide the dough in half and cover with plastic wrap and chill in the refrigerator for 1 – 3 hours.

Once chilled rolled the dough onto a floured surface until desired thickness. I printed a number 2 off of Microsoft Word for a template. Cut out a number 2 (or any design you want) from the dough. Reshape the remaining dough and repeat for as many layers as you want. I did three layers for this number 2 cake.

For the frosting, combine room temperature butter, vanilla, powdered sugar and whole milk. For each one cup of powdered sugar add one tablespoon of milk. Add the vanilla when you reach the desired consistency.

On each layer decorate with frosting. Use your imagination! I used four separate tips to decorate my cookie cake. For the circles I used a large round tip. The mini flowers I used a drop flower tip, the large flowers I used a closed star tip for both.

The cookies stay soft for days after baking!

Enjoy!!!!

Print

Number Cookie Cake

Course Cake, Cookies, Dessert
Cuisine American
Prep Time 1 hour
Servings 12 people

Ingredients

Number Cookie Cake

  • 1 1/2 cups unsalted butter room temperature
  • 2 cups granulated sugar
  • 4 eggs room temperature
  • 1 tsp pure vanilla extract
  • 5 cups flour
  • 2 tsp baking powder
  • 1 tsp salt

Vanilla Buttercream

  • 1 cup unsalted butter room temperature
  • 4 - 5 cups confectioners' sugar
  • 4 - 5 tbsp whole milk
  • 1 tsp pure vanilla extract

Instructions

Number Cookie Cake

  1. With a handheld or stand mixer fitted with a paddle attachment, beat the butter on medium speed until creamy – about 2 minutes

  2. Add sugar and beat until smooth.

  3. Add eggs one at time and beat after each egg until smooth. Add the vanilla with the last egg.

  4. Mix in flour, baking powder and salt. Blend well until combined.

  5. Divide dough in half and wrap with plastic wrap. Chill in refrigerate for 1 - 3 hours.

  6. Roll dough onto floured surface until desired thickness.

  7. Cut out your number or design. Reshape the remaining dough and repeat for as many layers as you want. Bake one layer on their own cookie sheet.

  8. Bake layers at 350 degrees for 8 -10 minutes or until golden brown. It depends on your thickness of the cookie and it can take longer to bake.

Vanilla Buttercream

  1. With a handheld or stand mixer fitted with a paddle attachment, beat the butter on medium speed until creamy – about 2 minutes

  2. Add 1 cup of confectioners' sugar and 1 tbsp milk at a time. Beat on low speed for 30 seconds after each cup of confectioners’ sugar and tablespoon of milk is added, then increase to medium-high speed and beat for 2 full minutes after the 4th cup is added. Add up to 1 cup more confectioners’ sugar if frosting is too thin or another tablespoon of milk if frosting is too thick. Once you've reached the desired consitency, mix in the vanilla.

  3. Assemble each layer of your cookie cake and decorate as desired.

Filed Under: Cakes, Cookies

Chocolate Nutella Basketball Cake

June 1, 2019

I was asked to make a cake for a high school basketball team for a dessert dash. It was a challenge to make but worth it! Plus it’s chocolate nutella so you know it’s tasty! I used the same cake recipe and frosting as my Chocolate Nutella Cupcakes. It’s also a great cake to make for the NBA playoffs since the Golden State Warriors are in the running! Go Warriors!

For the cake I used a half round cake pan. Make sure to coat the pan with lots of non stick spray so the cake doesn’t stick to the pan after it’s baked. Let the cake cool completely. Cut the cake in half and apply frosting to the middle of the cake. Attach the top of the cake and coat the whole cake with rest of the frosting.

I used a half sheet cake board for the background.

I used marshmallow fondant to decorate the outside of the cake.  It’s expensive to buy fondant so I wanted to make my own. Make the fondant, add orange gel food coloring and roll it out to about an 1/8 inch thick and cover the cake with fondant. Decorate the rest of the cake with the rest of the fondant and color the fondant with the corresponding colors for the back board, ball lines and if you want a team name added. When you add the basketball to the cake board make sure you have a round cake board under the basketball cake. The oils will spread onto the half sheet cake board if you don’t have a mini round one directly under the cake. Once the black lines are on the basketball, add the red rim and basket hoop strings.

Enjoy!

Print

Chocolate Nutella Basketball Cake

Course Cake, Dessert
Cuisine American
Keyword Chocolate Nutella Basketball Cake

Ingredients

  • 1 box chocolate cake mix or your favorite homemade recipe

Nutella Frosting

  • 1 cup butter
  • 1/2 cup shortening
  • 1 cup Nutella hazelnut spread
  • 4-5 cups powdered sugar
  • 3-4 tbsp milk or water

Marshmallow Fondant

  • 16 ounce package mini marshmallows
  • 2-5 tbsps water
  • 8 cups powdered sugar
  • 1/3 cup vegetable shortening

Instructions

  1. Bake cake as directed on the box. Let the cake completely cool.

Nutella Icing

  1. Beat together butter and shortening until smooth.

  2. Add Nutella and mix until smooth.
  3. Slowly add 4 cups of powdered sugar and mix until smooth.
  4. Add 2-3 tbsp of milk or water and mix until smooth.
  5. Add fifth cup of powdered sugar and mix until smooth.
  6. Add more water or milk until the right consistency.

Marshmallow Fondant

  1. Place marshmallows and 2 tablespoons of water in a large microwave-safe bowl. 
  2. Microwave for 30 seconds on high; stir until mixed well. Continue microwaving in 30 second intervals until they are melted and smooth.

  3. Place about 5 cups of the powdered sugar on top of the melted marshmallow mixture and gently fold it into the marshmallows.
  4. Grease your hands and your counter-top generously with shortening. Turn marshmallow mixture onto counter and start kneading it like you would dough.
  5. Add more confectioners' sugar as needed and re-grease your hands the counter-top as needed.
  6. If the marshmallow fondant is tearing easily, it is too dry; add water (about 1/2 tablespoon at a time) kneading until fondant forms a firm, smooth elastic ball that will stretch without tearing, about 8 minutes.
  7. To color fondant, add a little gel color to your desired amount and knead it with your hands until it absorbs all of the color. Add more color as needed to reach the desired colored. (I use medical gloves when mixing in the color. It's very helpful while cleaning your hands after).

  8. Follow directions above to assemble and decorate the cake.

Recipe Notes

TO STORE FONDANT:

To store the fondant, coat it with a thin layer of shortening, wrap it tightly with plastic wrap, and the place it in a resealable bag with all the air squeezed out. It will keep well in refrigerator for several weeks.
When ready to use, knead fondant until smooth. Roll out fondant 1/8 inch thick.

Filed Under: Cakes, Desserts

Oreo Chocolate Cake

April 5, 2019

This Oreo Chocolate Cake is a great option to take to any party. Who doesn’t like Oreos?! Everyone will be drooling over your dessert. It’s made with vanilla buttercream frosting with smashed up Oreos incorporated in the frosting. You can make this a two- or three-layer cake. Another great option (which I have made many times) is to make cupcakes. Whatever your heart desires or your party needs call for, your Oreo Chocolate Cake will be a hit!

Whip up that cake mix, bake it, smash up some Oreo’s and frost it!

Grab a slice of Oreo Chocolate Cake with a tall glass of milk! Did I mention you need to have a large slice?! It’s nice and rich and the milk will go perfectly.

Bring it to parties, make it for yourself or make it as a birthday cake!

Enjoy!!!

Print

Oreo Chocolate Cake

Course Cake, Dessert
Cuisine American
Keyword Oreo Chocolate Cake
Prep Time 30 minutes
Cook Time 20 minutes
Resting time 1 hour
Total Time 1 hour 50 minutes
Servings 12 slices

Ingredients

  • 1 box chocolate cake mix (make as directed on box)

Oreo Buttercream frosting

  • 1 package Oreos divided
  • 1 1/2 cups unsalted butter room temperature
  • 4 - 5 cups confectioners' sugar
  • 1/4 cup heavy cream
  • 2 tsp pure vanilla extract

Instructions

  1. Mix the cake batter as directed on box. Make the cake with two cake pans or 24 cupcakes. If making cake, divide up the batter equally between the two pans you will be using. Once baked, let the cakes cool completely.  

Oreo Vanilla Butter Cream Frosting

  1. With a handheld or stand mixer fitted with a paddle attachment, beat the butter on medium speed until creamy, about 2 minutes. Add 4 and 1/2 cups confectioners’ sugar, heavy cream, and vanilla extract. Beat on low speed for 30 seconds, then increase to high speed and beat for 3 full minutes. Add up to 1/2 cup more confectioners’ sugar if frosting is too thin or another tablespoon of cream if frosting is too thick.

  2. Crush up 3/4 of the package of Oreos. I put the Oreos inside a large plastic Ziploc bag and used a rolling pin to crush them up. You can use a food processor as well. 

  3. Add the crushed Oreos to the frosting and beat on low speed to incorporate the Oreos.

  4. Remove the cakes from the pans.

  5. First, using a large serrated knife, slice a thin layer off the tops of the cakes to create a flat surface. Discard or save and eat later.
  6. Place 1 cake layer on your cake stand, cake turntable, or serving plate. Spread frosting evenly on top. Use your own judgement on how much to use. 

  7. Top with 2nd cake layer and evenly cover the top with frosting. Cover the sides of the cake with frosting. Use a bench scraper or a butter knife to smooth out the frosting on the sides of the cake. 

  8. Using a flower tip and a piping bag pipe frosting around the top of the cake. Sprinkle the top with crushed Oreos. Cut a few of the remaining Oreos in half and place on top.


Filed Under: Cakes, Desserts

Vanilla Cake Pops

March 27, 2019

Vanilla Cake Pops are a perfect addition to your Easter celebrations. They are a must when you want to bake and you can even get your kids involved. Sprinkles galore!!! Why not dye eggs and make cake pops?!!

If you haven’t seen my Chocolate Cake Pops recipe it’s the exact same process. All you need to do is make a vanilla cake instead of a chocolate cake. I also made these Valentine day cake pops with the same recipe. This is how much I love them!

Put them on display for your family and friends at your Easter dinner and have them for dessert.

Enjoy!

Print

Vanilla Cake Pops

Course Cake, Dessert
Cuisine American
Keyword Vanilla Cake Pops
Prep Time 1 hour
Cook Time 25 minutes
Resting Time 2 hours
Total Time 1 hour 25 minutes
Servings 40 cake pops

Ingredients

Vanilla Cake

  • 1 2/3 cups cups all-purpose flour spoon & leveled
  • 1/2 tsp baking powder
  • 1/4 tsp baking soda
  • 1/2 tsp salt
  • 1/2 cup unsalted butter softened to room temperature
  • 1 cup granulated sugar
  • 1 large egg at room temperature
  • 2 tsp pure vanilla extract
  • 1 cup 2% milk

Frosting

  • 7 tbsp unsalted butter softened to room temperature
  • 1 3/4 cups confectioners' sugar
  • 2-3 tsp 2% milk
  • 1 tsp pure vanilla extract

Coating

  • 40 ounces candy melts or coating

Instructions

Vanilla Cake

  1. Whisk the flour, baking powder, baking soda, and salt together in a medium bowl. Set aside. Using a handheld or stand mixer fitted with a paddle or whisk attachment, beat the butter and sugar together in a large bowl until creamed, about 2 minutes. Add the egg and vanilla extract and beat on high speed until combined. Scrape down the bottom and sides of the bowl as needed.

  2. With the mixer running on low speed, add the dry ingredients and milk to the wet ingredients until combined. Make sure there are no large lumps at the bottom of the bowl. Batter will be slightly thick

  3. Grease the baking pan with non-stick spray. Pour the batter evenly into the prepared 9 x 13 pan. Bake for 25-27 minutes or until a toothpick inserted in the center comes out clean. Allow the cake to cool completely in the pan; set on a wire rack.

Vanilla Frosting

  1. With a handheld or stand mixer fitted with a paddle attachment, beat the butter on medium speed until creamy, about 2 minutes. Add confectioners' sugar, milk, and vanilla extract with the mixer running on low. Increase to high speed and beat for 3 full minutes.

  2. Crumble the cooled cake into the bowl on top of the frosting. Make sure there are no large lumps. Turn the mixer on low and beat the frosting and cake crumbles together until combined.
  3. Measure 1 Tablespoon of moist cake mixture and roll into a ball. I use a cookie scoop to measure out my ball. Place balls on a lined baking sheet. Refrigerate for 2 hours or freeze for 1 hour.

  4. Melt the coating in a 2-cup liquid measuring cup (best for dunking!). Use a microwave or you can use a double boiler and pour some out at a time into the liquid measuring cup. Let the coating cool down for a few minutes before you begin dipping. If it's too hot when you dip, the coating will crack.

Coat the cake balls

  1. Remove only 2-3 cake balls from the refrigerator at a time. Keep the rest cold! Dip a lollipop stick about 1/2 inch into the coating, then insert into the center of the cake ball. Only push it about halfway - 3/4 through the cake ball. Dip the cake ball into the coating until it is completely covered. Make sure the coating covers the base of the cake ball where it meets the lollipop stick. Very gently tap the stick against the edge of the measuring cup to allow excess coating to drop off. Decorate the top with sprinkles and place upright into a styrofoam block, box (flip the box upside down and poke the lollipops into the bottom of the box) or even tall shot glasses work. Repeat with remaining cake balls, only working with some out of the refrigerator at a time. The cake balls must be very cold when dipping!

  2. Coating will set within an hour. Store cake pops in the refrigerator for up to 1 week. You may freeze the cake pops for up to 3 months.

Filed Under: Cakes, Desserts

Valentine Vanilla Cake Pops

February 4, 2019

Valentine Vanilla Cake Pops should be added to your list for your special day! These are a perfect ratio between cake and icing. On your first bite you won’t regret making these for your friends or family, or that special someone. With all those red sprinkles, it’s just so festive!

Cake pops are a great way to eat just a small serving without devouring a whole cake. Like I say in a lot of my posts, I love personal sizes.

I’ve made chocolate cake pops before and I finally tried vanilla. If you’re more of a vanilla fan then this cake pop recipe is just for you. You can make these with any type of sprinkles or colored candy coating.  Since it was February, and Valentine’s Day is coming soon, I wanted to throw in the red sprinkles and make it festive.

Grab the recipe and start rolling and dipping those cake balls into something very delicious! Let me know what you think.

Wrap them up in miniature cellophane bags, tie them with a ribbon and give them out as Valentine gifts. You will be loved even more!

Enjoy!

Print

Valentine Vanilla Cake Pops

Course Cake, Dessert
Cuisine American
Keyword Valentine Vanilla Cake Pops
Prep Time 1 hour
Cook Time 25 minutes
Resting time 2 hours
Total Time 3 hours 25 minutes
Servings 40 cake pops

Ingredients

Vanilla Cake

  • 1 2/3 cups cups all-purpose flour spoon & leveled
  • 1/2 tsp baking powder
  • 1/4 tsp baking soda
  • 1/2 tsp salt
  • 1/2 cup unsalted butter softened to room temperature
  • 1 cup granulated sugar
  • 1 large egg at room temperature
  • 2 tsp pure vanilla extract
  • 1 cup 2% milk

Frosting

  • 7 tbsp unsalted butter softened to room temperature
  • 1 3/4 cups confectioners' sugar
  • 2-3 tsp 2% milk
  • 1 tsp pure vanilla extract

Coating

  • 40 ounces candy melts or coating

Instructions

Vanilla Cake

  1. Whisk the flour, baking powder, baking soda, and salt together in a medium bowl. Set aside. Using a handheld or stand mixer fitted with a paddle or whisk attachment, beat the butter and sugar together in a large bowl until creamed, about 2 minutes. Add the egg and vanilla extract and beat on high speed until combined. Scrape down the bottom and sides of the bowl as needed.
  2. With the mixer running on low speed, add the dry ingredients and milk to the wet ingredients until combined. Make sure there are no large lumps at the bottom of the bowl. Batter will be slightly thick.

  3. Prepare a 9x13 pan and spray with non-stick coating. Pour the batter evenly into the pan. Bake for 25-27 minutes or until a toothpick inserted in the center comes out clean. Allow the cake to cool completely in the pan; set on a wire rack.

Vanilla Frosting

  1. With a handheld or stand mixer fitted with a paddle attachment, beat the butter on medium speed until creamy, about 2 minutes. Add confectioners' sugar, milk, and vanilla extract with the mixer running on low. Increase to high speed and beat for 3 full minutes.
  2. Crumble the cooled cake into the bowl on top of the frosting. Make sure there are no large lumps. Turn the mixer on low and beat the frosting and cake crumbles together until combined.
  3. Measure 1 Tablespoon of moist cake mixture and roll into a ball. I use a cookie scoop to measure out my ball. Place balls on a lined baking sheet. Refrigerate for 2 hours or freeze for 1 hour.
  4. Melt the coating in a 2-cup liquid measuring cup (best for dunking!). Use a microwave or you can use a double boiler and pour some out at a time into the liquid measuring cup. Let the coating cool down for a few minutes before you begin dipping. If it's too hot when you dip, the coating will crack.

Coat the cake balls

  1. Remove only 2-3 cake balls from the refrigerator at a time. Keep the rest cold! Dip a lollipop stick about 1/2 inch into the coating, then insert into the center or the cake ball. Only push it about halfway - 3/4 through the cake ball. Dip the cake ball into the coating until it is completely covered. Make sure the coating covers the base of the cake ball where it meets the lollipop stick. Very gently tap the stick against the edge of the measuring cup to allow excess coating to drop off. Decorate the top with sprinkles and place upright into a styrofoam block, box (flip the box upside down and poke the lollipops into the bottom of the box) or even tall shot glasses work. Repeat with remaining cake balls, only working with some out of the refrigerator at a time. The cake balls must be very cold when dipping!

  2. Coating will set within an hour. Store cake pops in the refrigerator for up to 1 week. You may freeze the cake pops up to 3 months.


Filed Under: Cakes, Desserts

White Chocolate Raspberry Cheesecake Cookies

October 7, 2018

I remember years ago I was at Subway and I had one of their White Chocolate Raspberry Cheesecake Cookies. I couldn’t believe how much I loved this cookie on the very first bite. I was determined to make these cookies. The first time I made them I knew I had a winner of a cookie.  They are so soft and fluffy! They are like mini cakes inside.

The secret ingredient to these cookies is “Jiffy” raspberry muffin mix.

Mix the butter, cream cheese, shortening and brown sugar together. Add the eggs, muffin mix and flour. Stir in white chocolate chips.  Cool cookie batter in the refrigerator for 30 minutes before baking.

Roll the batter into 1 inch balls on a greased cookie sheet. I use parchment paper and lightly grease the parchment paper either method works great. I use a cookie scoop to roll the balls. Here is a similar one that I use. Preheat oven to 350 degrees and bake for 10-12 minutes or until golden brown. In between batches store the extra batter in the refrigerator.

If you love these White Chocolate Raspberry Cheesecake Cookies tell your friends or stop going to Subway to buy them and make them yourself. Enjoy!

Print

White Chocolate Raspberry Cheesecake Cookies

Course Dessert
Keyword White Chocolate Raspberry Cheesecake Cookies
Prep Time 20 minutes
Cook Time 12 minutes
Resting Time 30 minutes
Total Time 32 minutes
Servings 30 cookies

Ingredients

Ingredients

  • 4 ounces cream cheese softened
  • 1/2 cup (1 stick) butter softened
  • 2 tbsp shortening
  • 1/2 cup brown sugar
  • 2 eggs
  • 2 - 7 ounce boxes Jiffy raspberry muffin mix
  • 1/2 cup all-purpose flour
  • 1 1/2 cup white chocolate chips

Instructions

Instructions

  1. Beat together with paddle attachment cream cheese, butter, shortening and brown sugar in a large mixing bowl until combined. Add eggs one at a time beating after each one.

  2. Mix in muffin mix and flour until just combined. Add white chocolate chips and stir until incorporated.
  3. Chill dough in the refrigerator at least 30 minutes.
  4. Preheat oven to 350 degrees. Line baking sheet with parchment and lightly spray with grease or lightly grease baking sheets.

  5. Scoop cookie dough mix into 1 inch balls onto baking sheets. Bake 10-12 minutes or until golden brown on edges.

  6. In between baking batches of cookies make sure to store the dough in the refrigerator.


Filed Under: Cookies, Desserts

Monster Cake

October 6, 2018

This would be the perfect cake to add to a Halloween party. How cute is this Monster Cake?!

I got to make this cake for a one year old birthday a few weeks ago and I think it would be great for Halloween too! Little Andrew destroyed the cake. He loved every bit of the Monster Cake!

To begin you will need two round 8 inch pans. Spray the bottom of the pans with nonstick already. Cut out parchment paper and lay it at the bottom of the pans. Spray the parchment paper. This helps the cake to release easily from the pans.

Make your batter from any cake mix. I decided to use a boxed cake cause Andrew was going to destroy the cake anyway. Bake the cake per instructions on the box. Let the cake cool before frosting. Make the frosting while the cakes are cooling. You can use paste or food coloring to add to the frosting. Use any color!

When the cakes are completely cooled cut the top of the cakes off so you have a flat surface on each cake. Take one cake and cover the top with frosting. Add the second cake to the top of the other frosted cake. Cover the cake with frosting. It doesn’t need to be perfect.

Cut out the smile for the cake from black fondant and apply it to the front of the cake.

At this point you’ll start to pipe the fur so it becomes a monster. Don’t be scared it’s easy! Using a Wilton 233 M tip and a piping bag, fill the bag half full of buttercream frosting. Pipe and pull at different lengths, in rows starting at the bottom of the cake and work your way up while frosting. This will give the fur a shaggy look. Go around the whole cake. When you get to the top do the same method but only go around the edge one row at a time.

Once you finish frosting the cake make the eyes. Roll white fondant in a ball and add black circles to the eyes. Stick a lollipop stick in the bottom middle of the eyes. Stick them into the top of the cake whenever you want. Roll out white fondant for the two teeth and cut out two small squares. Attach the two squares to the mouth.

Showing is the Wilton tip 233 M, the eyes for the cake and a fondant roller I used to roll of the middle of the eyes and mouth.

Your cake is now complete! I also made mini cupcakes for the adults to eat and added sugar eye balls to the tops. I used black icing for the mouths on the cupcakes.

The cake destroying was the best part of the day from Andrew. He loved it! This was his first little nibble and he was trying to figure it out.

Pretty sure he realized at this point he loved the Monster Cake!

He destroyed almost the whole thing. Great job for a one year old!


Filed Under: Cakes, Desserts

Cat Cake

September 30, 2018

In a previous post when I posted my White Chocolate Raspberry Cake I mentioned I was making a cat cake for the Seattle Area Feline Rescue for their Nine Lives Gala. I donated this cat cake for their dessert dash. It was a fun cake to make and I’m so glad I was a part of it.  I hope they raised a lot of money to save some kitties. In this post I will share how I made the cat cake.

I’ll only be sharing what equipment you need. For the cake recipe please use my White Chocolate Raspberry Cake recipe.  A helpful hint when applying the white chocolate to the cake make sure you apply it right after you frost the cake. I waited too long and the white chocolate didn’t stick as well because the frosting harden up a bit.

Equipment needed:

Two 6 inch pans. I use these from Wilton

Two 4 inch pans. I use these from Wilton

Fondant for the ears, tail and collar.

Fondant Heart cut and press for the collar. You can use any decorations you want for the collar.

Fondant roller or rolling pin.  I suggest using the fondant rolling pin since it’s a lot easier to use and the fondant doesn’t really stick to this.

I always like to buy from Hobby Lobby and Joann Fabrics because they have daily coupons that I use for 40 – 50% off one regular priced item. You need to download their app on your phone. Sometimes Amazon is still cheaper.  I’m a bargain shopper!

When rolling out the fondant roll it out to a 1/4 inch thick.  For the ears I cut out two triangles that were  a little more round. Press the triangles together and unfold them to get a crease in the middle of the ears. Cut slits on the top of the cake as the same size of the ears and attach the ears to the top of the cake. The slits help the ears stay in place so they won’t fall over. I used a little bit of water on the outside of the ears and sprinkled them with white chocolate to give them some texture.

Cut a one inch strip of colored fondant and wrap it around the second layer of the cake for the collar. Punch out a heart from the fondant and attach it to the collar.  If the heart doesn’t stick to the collar use a little bit of water so it sticks to the collar.

For the tail use your imagination. All I did was roll the fondant in a strip and I wrapped it around the cake and added some bends and curl to the end of the tail.  To attach the tail cut out a circle in the back of the cake and stick the tail in the circle of the cake.  Apply more frosting around the tail to make sure it doesn’t move. Add more white chocolate if needed.  Here’s a picture for your reference. It’s not perfect but it worked!

Here is more of a side view of the cake so you can see more of the tail.

I’m so happy that I could contribute for such a good cause! Who doesn’t love kitties and cat cakes?!


Filed Under: Cakes, Desserts

  • Page 1
  • Page 2
  • Go to Next Page »

Primary Sidebar

Hello and Welcome

Hi! I'm Holly and welcome to my personal blog and thank you for taking the time to look through my recipes and hiking adventures. I hope you enjoy them as much as me. Stay connected to see upcoming blog posts! I'm excited to have you join!

Recent Posts

  • Sourdough Focaccia
  • Andes Mint Truffles
  • Cole Slaw
  • Pumpkin Spice Cupcakes
  • Chicken Tortilla Soup

Archives

  • October 2024
  • December 2023
  • October 2023
  • August 2022
  • April 2022
  • February 2022
  • January 2021
  • May 2020
  • April 2020
  • February 2020
  • November 2019
  • October 2019
  • August 2019
  • July 2019
  • June 2019
  • May 2019
  • April 2019
  • March 2019
  • February 2019
  • January 2019
  • December 2018
  • November 2018
  • October 2018
  • September 2018
  • August 2018
  • July 2018
  • June 2018
  • May 2018

Categories

Don’t Miss These!

7-Layer Bean Dip

Bagel Bites

Gooey Chocolate Chip Cookies

Valentine Vanilla Cake Pops

Most Popular Recipes

Curry Couscous Salad

Watermelon Frosé (Frozen Rosé)

Footer

My Favorites

stay connected

  • Facebook
  • Instagram
  • Pinterest

Don’t miss a recipe or an adventure!

Copyright© 2026 · Brunch Pro Theme by Feast Design Co.