My blog turned one today! I can’t believe it’s been a year since I took the leap of starting a blog. I’ve always wanted to start a blog and I finally did it and I couldn’t be happier to share all of my recipes and hiking adventures with YOU!
I’ve posted 51 blog posts in my first year, making this one #52! It’s been a fun year of baking, hiking and blogging. Soon enough I will be adding more hiking posts. Thank you for making this fun for me and following my page. Tell your friends about my blog if you love it as much as me!
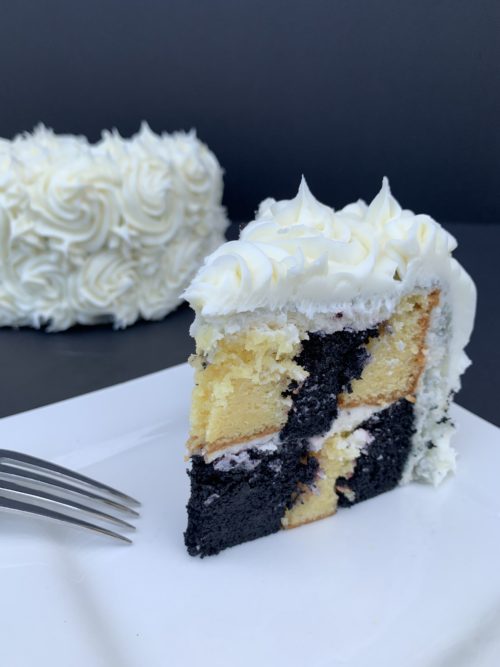
I made this Vanilla Checkered Cake to celebrate my one year anniversary of my blog! YAY! Turning one is fun!
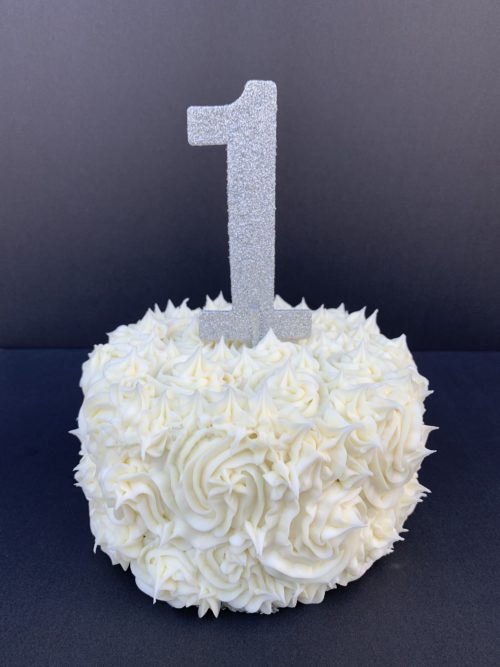
Don’t let the inside of the cake scare you, it’s easier than you think. But if you don’t want to attempt the checkered cake you can just leave it all one color. Either way it’s delish! You can’t go wrong with vanilla cake and vanilla buttercream. All the details of this cake will be in the recipe. I really enjoyed making this Vanilla Checkered Cake!
Enjoy!!!
Vanilla Checkered Cake
Ingredients
- 1 box vanilla cake mix
- 1 3oz box vanilla pudding
- 1 cup water
- 1/3 cup vegetable oil
- 3 large eggs
Vanilla Butter Cream
- 1 cup unsalted butter at room tempature
- 4-5 cups confectioners’ sugar
- 1/4 cup whole milk
- 2 tbsp pure vanilla extract
- salt to taste
- black gel food coloring
Instructions
-
Preheat oven to 350 degrees. Grease two 6 inch pans and set aside.
-
Combine cake mix, vanilla pudding, water, oil and eggs in a mixing bowl. With the paddle attachment mix until well combined when no lumps appear.
-
Pour half the batter into one pan. Add the black food coloring. I usually dip a knife into the gel food coloring and add it that way. You don't need much. Mix the food coloring until incorporated. Pour the black batter into the other greased pan. Bake cakes for 26 - 31 minutes. Poke a tooth pick in the middle until it comes out clean.
-
Let the cakes completely cool on a wire rack.
Vanilla Buttercream
-
While the cake is cooling make the frosting. With a handheld or stand mixer fitted with a paddle attachment, beat the butter on medium speed until creamy – about 2 minutes. Add 4 and 1/2 cups confectioners’ sugar, the heavy cream, and vanilla extract. Beat on low speed for 30 seconds, then increase to high speed and beat for 3 full minutes. Add up to 1/2 cup more confectioners’ sugar if frosting is too thin or another tablespoon of cream if frosting is too thick. Add a pinch of salt if frosting is too sweet.
Assembling the cake
-
Once the cakes are completely cooled cut the top of the cakes off with a serrated knife and make the tops even.
-
You will need a 4 inch and a 2 inch cookie cutter for the next steps (you can also use a template and cut your circles out with a knife). You will need to cut two circles from each layer.
-
First, insert the smallest circular cutter into the center of each layer. Carefully remove the centers, leaving them intact.
-
Cut your larger circles. The idea is to make the width of the cake in each of your rings as equal as possible, so that the squares of your checkerboard will all appear to be equal in size.
-
You will have a few circles to piece back together. When you put the cakes together alternate colors. If you have white on the outside, black will be the second layer and the inside layer will be white. Black on the outside, white in the middle and the inside layer will be black.
-
Apply a layer of frosting to the top of the bottom cake. Stack your cakes on top of each other. Put a good crumb coat on… as in, a crumb coat that conceals the cake underneath. It can be sloppy and uneven, but you should not be able to see what color the cake is.
*crumb coat explanation below!
-
To get the rosette effect on the cake you will need to use tip #1M and a piping bag. Fill the bag up with buttercream. If you have an appropriately sized coupler you can use that, or you can just insert the tip into the bag and cut off the excess.
-
To make your rose, start in the center, then slowly move your tip in a circle around the center point. I wanted a single rose to span the side of the cake so I looped around my center point twice. Try to end in the same place each time.
-
Go all the way around the cake and complete with one last rose! Then go back and add the roses to the top using the same method.
-
When making flowers that big, you are bound to have some empty spaces in the cake. Go back in and add dollops of stars with the tip.
Recipe Notes
I also added some silver sprinkles on the crumb coat to give it a little extra crunch when you bite into the cake!
*A crumb coat is a thin layer of frosting applied all over the cake that seals in stray crumbs before the roses are piped onto the cake.