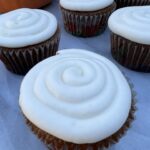
Chocolate Cake Pops are the perfect dessert if you don’t want to binge on eating a lot of cake. Bite size means personal size! But you can eat more than one of these chocolate cake pops. Trust me I ate more than one.
Get ready to have some fun making these chocolate cake pops. It’s a process but it’s fun from the beginning and they turn out delicious. I couldn’t believe how perfect the ratio was between the cake and frosting. My mouth is watering as I type this cause I want to eat more!
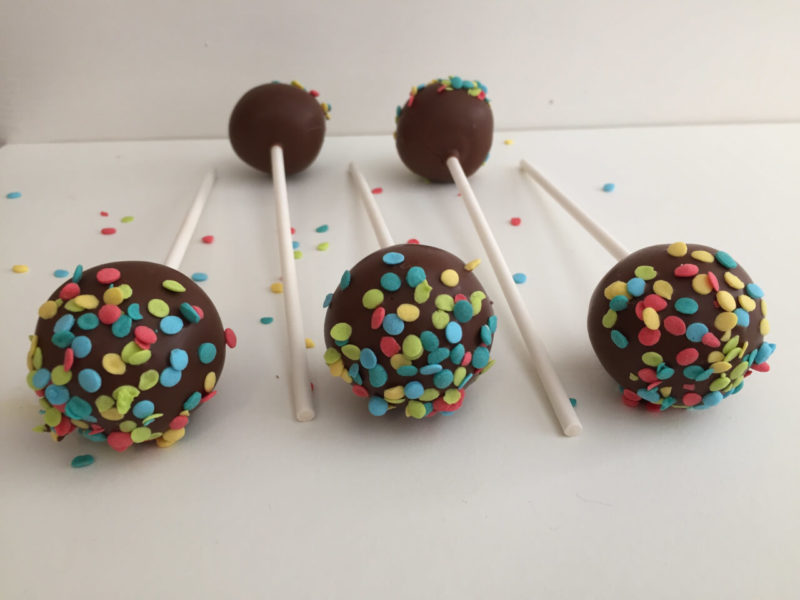
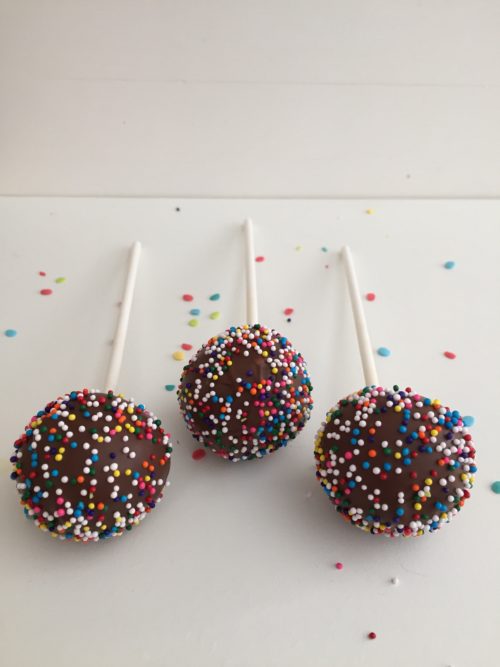
Chocolate cake pops are fun to decorate anyway you want. I used two different types of sprinkles but you can use anything to make them your way. Get creative! Sprinkles, dust powder, mini candies and you can even get other colors in the coating to make swirl shapes with different colors.
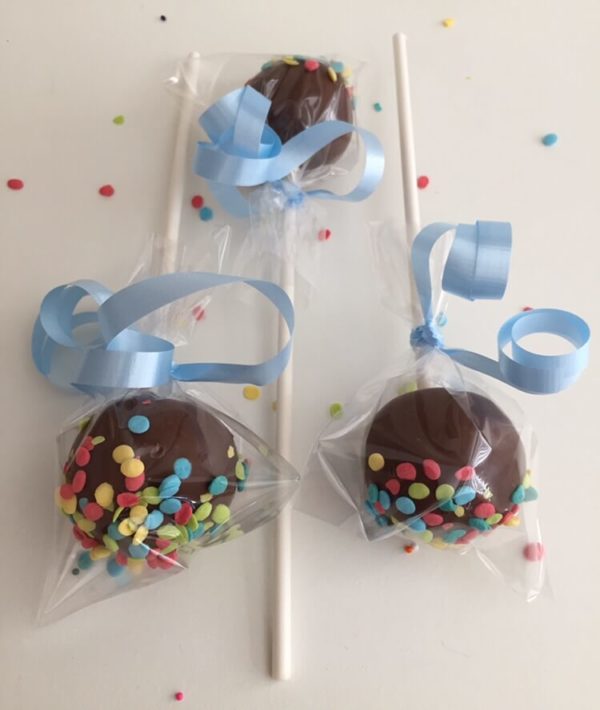
These are great as a gift and even take them to your next party. Wrap them up in cellophane mini bags and tie them with ribbon. People will love you after they eat these chocolate cake pops!
Chocolate Cake Pops
Ingredients
- 1 cup all-purpose flour spoon & level
- 1 cup granulated sugar
- 6 tbsp unsweetened natural cocoa powder
- 1/2 tsp baking soda
- 1/4 tsp salt
- 1/2 cup vegtable oil
- 2 large eggs at room tempature
- 1/2 cup hot water
Chocolate Frosting
- 6 tbsp unsalted butter soften, at room tempature
- 3/4 cup confectioners' sugar
- 1/2 cup unsweetened natural cocoa powder
- 2-3 tsp heavy cream or milk
- 1/2 tsp pure vanilla extract
Chocolate Coating
- 12 ounces candy melts or coating
- sprinkles
- lollipop sticks
Instructions
-
Preheat oven to 350°F (177°C). Grease a 9-inch pan (round or square)
Chocolate Cake
-
Whisk the flour, granulated sugar, cocoa powder, baking soda, and salt together in a large bowl. Set aside. Whisk the oil, eggs, and vanilla together in a medium bowl. Pour the wet ingredients into the dry ingredients, add the hot water, and whisk everything together until combined. Make sure there are no pockets of dry ingredients hiding.
-
Pour the batter evenly into the prepared pan. Bake for 25-27 minutes or until a toothpick inserted in the center comes out clean. Allow the cake to cool completely in the pan set on a wire rack.
Choloate Frosting
-
With a handheld or stand mixer fitted with a paddle attachment, beat the butter on medium speed until creamy, about 2 minutes. This isn't a lot of butter and it will get stuck on the sides of the bowl, so you may need to scrape down the sides of the bowl with a rubber spatula to really help get it creamed. Add confectioners' sugar, cocoa powder, 2 teaspoons of heavy cream/milk, and vanilla extract with the mixer running on low. Increase to high speed and beat for 3 minutes until it really comes together. Add another teaspoon of milk/cream if it looks a little too thick.
-
Crumble the cooled cake into the bowl on top of the frosting. Make sure there are no large lumps. Turn the mixer on low and beat the frosting and cake crumbles together until combined.
-
Measure 1 scant Tablespoon of moist cake mixture and roll into a ball. Place balls on a lined baking sheet. Refrigerate for 2 hours or freeze for 1 hour.
-
Melt the coating in a 2-cup liquid measuring cup (best for dunking!). Use a microwave or you can use a double boiler and pour some at a time into the liquid measuring cup. Let the coating cool down for a few minutes before you begin dipping. If it's too hot when you dip, the coating will crack.
Coat the cake balls
-
Remove only 2-3 cake balls from the refrigerator at a time. (Keep the rest cold!) Dip a lollipop stick about 1/2 inch into the coating, then insert into the center or the cake ball. Only push it about halfway - 3/4 through the cake ball. Dip the cake ball into the coating until it is completely covered. Make sure the coating covers the base of the cake ball where it meets the lollipop stick. Very gently tap the stick against the edge of the measuring cup to allow excess coating to drop off. Decorate the top with sprinkles and place upright into a styrofoam block, box (flip the box upside down and poke the lollipops into the bottom of the box) or even tall shot glasses work. Repeat with remaining cake balls, only working with some out of the refrigerator at a time. The cake balls must be very cold when dipping!
-
Coating will set within an hour. Store cake pops in the refrigerator for up to 1 week. You may freeze the cake pops up to 3 months.
Recipe Notes
If you don't want to use a lollipop stick you can always use a toothpick to dip the cake balls into the coating but make sure to stick the toothpick all the way in so it can hold the weight of the ball while dipping.